No Egg Recipes – Delicious Cooking Without Eggs
Perfect Oreo Mug Cake: The 3-Minute Recipe That Actually Works
Frustrated by gummy mug cakes? Elsie's perfected Oreo Mug Cake recipe fixes common issues, creating a genuinely cake-like dessert in just 3 minutes. Discover
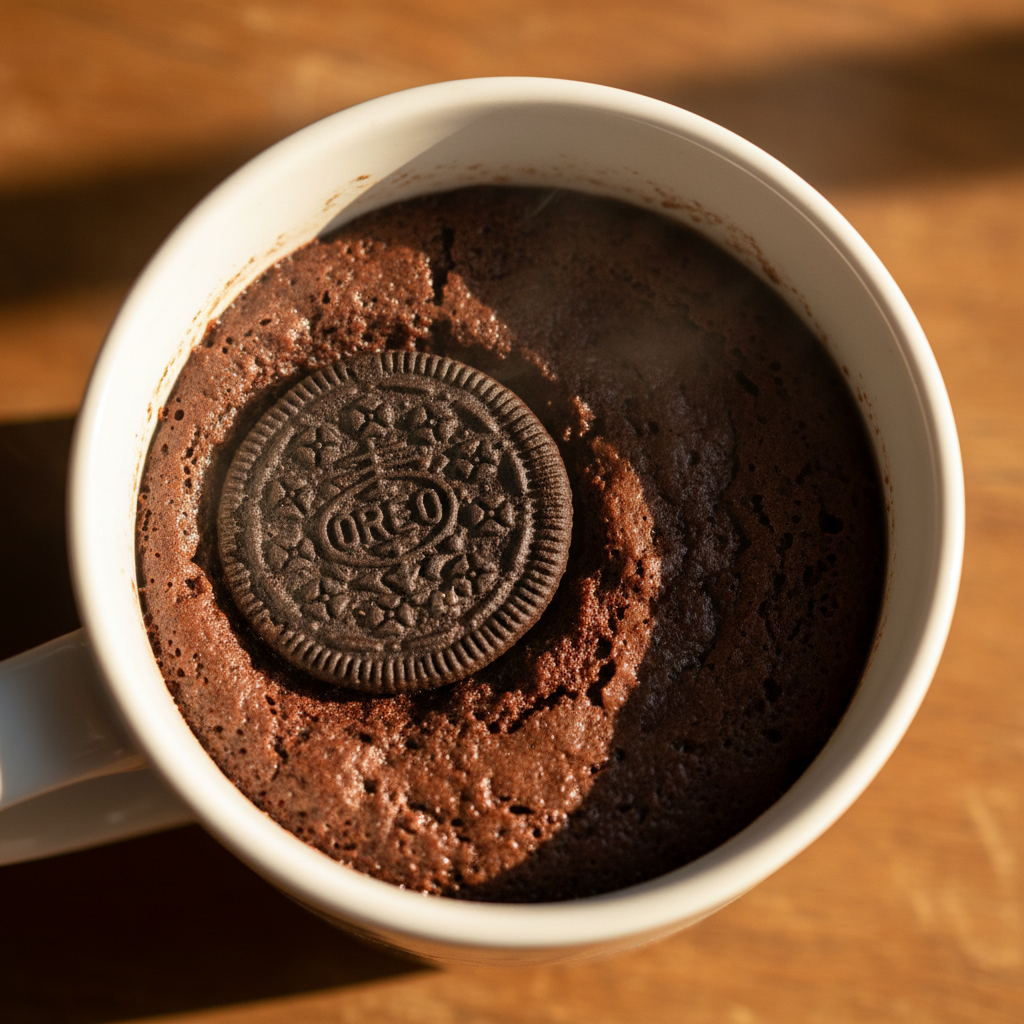
After countless late-night disappointments with the viral 2-ingredient Oreo mug cake that promised so much but delivered a gummy mess, I’ve finally cracked the code. This improved Oreo mug cake recipe transforms those humble sandwich cookies into a genuinely cake-like dessert in just minutes. By adding a few strategic pantry ingredients, I’ve fixed the texture problems that plague the simplified versions floating around social media.
- Texture target: Moist, fluffy interior with slightly underbaked center
- Equipment essential: 350ml mug prevents overflow disasters
- Make-ahead option: Prepare dry ingredients in advance for 60-second assembly
Table of Contents
Improved 1-Minute Oreo Mug Cake
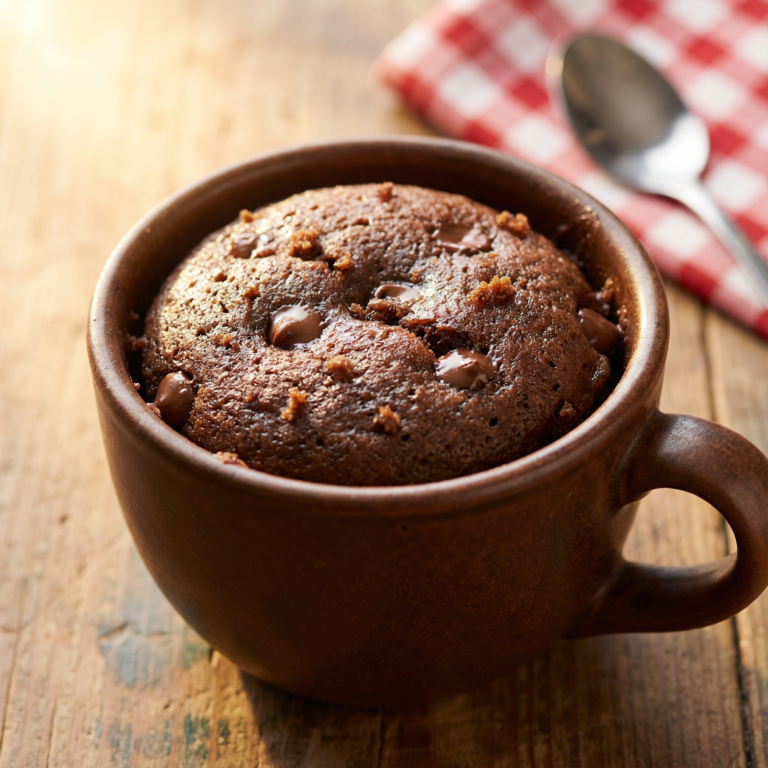
A rich, chocolatey, and moist single-serve cake made in less than 2 minutes. This version improves on the viral 2-ingredient recipe by adding a few pantry staples for a true cake-like crumb.
PREP TIME
4 mins
4 mins
COOK TIME
1 mins
1 mins
TOTAL TIME
5 mins
5 mins
Servings: 1 mug cake
Course: Snack
Cuisine: American
Calories: 375
🥄 Ingredients
- 5 original Oreo cookies (approx. 57 g)
- 0.25 cup milk of choice (60 ml)
- 1 tablespoon caster / superfine sugar (12 g)
- 1 tablespoon all-purpose flour (9 g)
- 0.5 teaspoon baking powder (2 g)
- 1 teaspoon unsweetened cocoa powder (2 g)
👩🍳 Method
- In a large microwave-safe mug (350 ml / 12.5 oz capacity), place 4 Oreo cookies and pour in the 0.25 cup (60 ml) of milk.
- Use a fork to mash the cookies into the milk until they are mostly dissolved and the mixture is relatively smooth.
- Add the 1 tablespoon (12 g) caster sugar, 1 tablespoon (9 g) all-purpose flour, 0.5 teaspoon (2 g) baking powder, and 1 teaspoon (2 g) cocoa powder to the mug.
- Stir the mixture vigorously with the fork until all dry ingredients are fully incorporated and no lumps remains.
- Take the remaining 1 Oreo cookie and press it vertically into the center of the batter until it is completely covered.
- Microwave on full power (based on 1100W) for 60 seconds. The top should look set but still slightly moist.
- Allow the cake to rest and cool for 2 minutes before eating to let the steam finish the cooking process.
Notes: The secret to a moist cake is removing it while it still looks slightly under-baked on top. It will continue to set as it rests. Adjust time by 5-10 seconds based on microwave power.
Why This Improved Oreo Mug Cake Beats the Viral Version
The viral 2-ingredient Oreo mug cake (just cookies and milk) seemed too good to be true – and unfortunately, it was. After multiple attempts in my Castleton kitchen, I discovered why these simplified recipes often fail. The cookie-only base creates a dense, sometimes gummy texture that feels nothing like real cake. My daughter Molly’s disappointment after a particularly rubbery attempt drove me to experiment.
The secret to transforming this treat lies in adding just a few key ingredients: a touch of baking powder creates proper lift and airiness, while a sprinkle of cocoa powder intensifies the chocolate flavor. A pinch of salt balances sweetness, and a tiny splash of vanilla extract rounds everything out beautifully. These small additions require minimal extra effort but completely transform the result from disappointing to delicious.
The improved version maintains the convenience of a quick microwave dessert while delivering a true cake-like experience – soft, moist, and with that slightly underbaked center that makes mug cakes so irresistible. Best of all, it still takes under 3 minutes to make from start to finish, perfect for those urgent sweet cravings. For more tips on mug cake techniques, check out this comprehensive guide.
Ingredient Notes & Substitutions
The foundation of this recipe remains Oreo cookies, but understanding a few key ingredients makes all the difference in achieving the perfect texture. For the cookies themselves, regular Oreos work beautifully, but Double Stuf or any flavored varieties can create interesting variations. There’s no need to scrape out the cream filling – it becomes part of the cake’s sweetness and moisture.
When it comes to milk, the type you choose significantly impacts the final texture. Whole dairy milk creates the richest results, but 2% works nearly as well. For plant-based options, I’ve found oat milk produces the creamiest texture, followed by soy milk. Almond milk works but creates a slightly drier cake, so you might want to add an extra teaspoon if using it. Coconut milk imparts a tropical note that pairs wonderfully with certain variations.
The baking powder is non-negotiable for proper lift – without it, you’ll end up with that dense, gummy texture we’re trying to avoid. If you’re out of cocoa powder, you can omit it, but the chocolate flavor won’t be as pronounced. For the vanilla extract, pure is preferable, but artificial works in a pinch. If you’re looking to reduce sugar, the good news is that no additional sugar is needed beyond what’s in the cookies themselves. Explore more on healthy mug cakes for better dessert choices.
Equipment Essentials for Microwave Baking
The right mug makes all the difference between a perfect cake and a microwave disaster. After cleaning up one too many overflows in my kitchen, I’ve learned this lesson the hard way. Always choose a mug with at least a 350ml capacity – this gives the cake room to rise without creating a volcanic eruption. Wide, shallow mugs don’t work as well as taller ones with straight sides, as they don’t guide the rising batter properly.
Microwave-safe ceramic mugs conduct heat more evenly than glass, though both materials work. Avoid metal-trimmed mugs or anything with metallic decoration, as these can cause sparking in the microwave. A microwave-safe plate underneath your mug catches any potential overflow and makes transport easier when the cake is hot.
For mixing, a small fork works better than a spoon, as it helps break down the Oreo pieces more thoroughly and incorporates air into the mixture. If you want to get fancy, a mini silicone spatula helps scrape down the sides for even mixing. The spatula is also perfect for loosening the edges of the finished cake if you plan to turn it out onto a plate rather than eating directly from the mug. Remember to use a mug recipe as your guide for perfecting proportions.
Pro Tips for Perfect Mug Cake Texture
The difference between a mediocre mug cake and an exceptional one often comes down to technique. First, crush your Oreos to a consistently fine texture – leaving some larger chunks creates uneven baking. I place them in a zip-top bag and crush with a rolling pin until they resemble coarse sand with a few small pieces for texture.
When mixing, don’t overdo it. Stir just until the dry ingredients are moistened and no dry spots remain. The batter should look thick but pourable, similar to pancake batter – if it’s too thick, add a tiny splash more milk. A crucial visual cue: when you tap the mug gently on the counter, the surface should level slightly but not be watery.
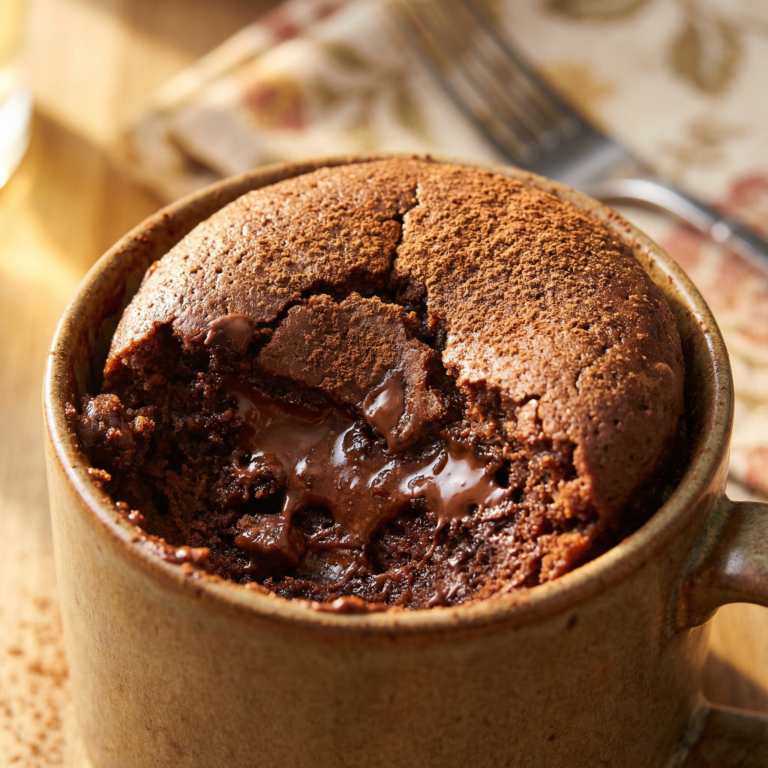
Microwave timing is everything. Start with 60 seconds at 800-900 watts, then check. The perfect cake looks slightly underbaked on top – if it appears completely dry, you’ve overcooked it. The center should have a slight jiggle, as the cake will continue cooking from residual heat. Let it rest for one minute after microwaving to complete the cooking process and set the texture. This patience pays off with a moister, more tender result that avoids the rubbery texture that plagues many microwave desserts.
Troubleshooting Common Microwave Issues
If your mug cake overflows during cooking, your mug was likely too small or you microwaved it too long. Next time, use a larger mug (at least 350ml) and check after 45 seconds, then add additional 10-second intervals as needed. Remember that different microwaves vary in power, so the first attempt may require some adjustment.
Dealing with a gummy or rubbery texture? This usually indicates either too much moisture or overbeating the mixture. The batter should be moist but not soupy. If using very fresh, moist Oreos, you might need slightly less milk. Also, mix gently until just combined – vigorous stirring develops gluten, creating that unwanted rubbery quality. For help with softening textures in recipes, check out eggless baking guides.
For a cake that’s too dry, you’ve likely overcooked it or your microwave runs hot. Next time, reduce the cooking time by 10-15 seconds. The center should look slightly underbaked when you remove it, as it continues cooking from residual heat.
Uneven cooking can result from a microwave without a turntable. If your microwave doesn’t rotate automatically, stop halfway through cooking to turn the mug manually. Cold spots in the microwave can also cause problems, so position your mug in the center for the most even heat distribution.
Variations & Flavor Twists
The beauty of this improved Oreo mug cake lies in its versatility. For a mint chocolate version that’s perfect for the holidays, use Mint Oreos and add a tiny drop of peppermint extract. My daughter Molly’s favorite variation is the peanut butter surprise – use regular Oreos but add a spoonful of peanut butter to the center before microwaving for a molten peanut butter core.
During autumn in our Castleton home, I love making a pumpkin spice version by using Golden Oreos with a pinch of pumpkin pie spice and a tablespoon of pumpkin puree. For a more adult dessert, try the mocha variation by replacing half the milk with cooled strong coffee and adding a pinch of espresso powder.
Birthday cake Oreo mug cake is perfect for celebrations – use Birthday Cake Oreos and fold in a few colorful sprinkles just before microwaving. For a fruity twist, crushed freeze-dried strawberries or raspberries added to the batter create beautiful color and flavor, especially when using Golden Oreos as the base.
S’mores lovers should try adding a few mini marshmallows on top in the last 10 seconds of cooking, then sprinkle with crushed graham crackers for that campfire dessert experience without the fire. The flavors might inspire you to explore more cookie variations too.
Serving & Topping Suggestions
While this Oreo mug cake is delicious straight from the microwave, the right toppings can elevate it to dessert heaven. A scoop of vanilla ice cream is the classic choice – the contrast between the hot cake and cold ice cream creates magic as the ice cream melts into the warm cake. For chocolate lovers, a drizzle of chocolate sauce or a sprinkle of mini chocolate chips while the cake is still hot lets them melt slightly into the surface.
Whipped cream makes a lighter topping alternative, and I like to add a few Oreo crumbs on top for visual appeal and texture contrast. Fresh berries like strawberries or raspberries add a tangy brightness that cuts through the richness of the cake. For special occasions, a sprinkle of edible glitter or colorful sprinkles makes this humble mug cake feel festive.
If serving to guests, consider transferring to a small dessert bowl (though the cake might break a bit) and adding a mint leaf garnish. For a deconstructed cookies and cream effect, serve with a small glass of cold milk on the side. When making this as a late-night treat for myself, I sometimes add a tiny pinch of flaky sea salt on top to enhance all the flavors – a chef’s secret that makes all the difference.
Comparing Microwave vs. Oven Methods
While the microwave method is the star of this quick Oreo cake, I’ve experimented with oven-baking for comparison. The microwave version is ready in under 3 minutes total, making it perfect for sudden sweet cravings. The texture is moist and slightly denser in the center, with a more pudding-like quality that many people adore in mug cakes.
The oven version, baked in a ramekin at 350°F (175°C) for about 15 minutes, produces a more even, traditional cake texture with a slight crust on top. The flavor develops more deeply, but you lose the gooey center that makes microwave versions so appealing. The oven method also requires preheating, which extends the total time to nearly 25 minutes.
For texture purists who prefer traditional cake consistency, the oven method might be worth the wait. However, for most late-night dessert emergencies or quick treats, the microwave version wins hands-down. The speed-to-satisfaction ratio simply can’t be beaten, and the slightly underbaked center becomes part of the charm rather than a flaw.
If you do opt for the oven method, use an oven-safe ramekin rather than a mug, and place it on a baking sheet for stability. The baking time will vary based on your oven’s accuracy and the depth of your container.
Storing and Reheating Tips
While mug cakes are best enjoyed fresh from the microwave, sometimes even I can’t finish a whole one at once. Contrary to popular belief, leftover mug cake can be stored and enjoyed later if you know the right techniques. Cover the mug with plastic wrap or transfer the cake to an airtight container and refrigerate for up to 2 days. The texture will become more dense and fudgy as it cools – some of my family members actually prefer it this way.
To reheat, microwave the cake for 15-20 seconds until just warmed through. Be careful not to overheat, as this will dry it out. Adding a small splash of milk before reheating helps restore moisture. For a contrasting temperature experience, try eating half the cake warm, then refrigerating the remainder to enjoy as a chilled dessert later.
For meal prep enthusiasts, you can prepare the dry ingredients in advance. Crush Oreos and mix with baking powder, salt, and cocoa powder, then store in small containers or zip-top bags. When a craving hits, just add milk and microwave. These dry mixes keep well for up to two weeks in an airtight container.
I don’t recommend freezing the baked mug cake, as the texture significantly deteriorates upon thawing. However, if you’ve made multiple cakes and truly can’t eat them within a couple of days, freezing is better than wasting. Thaw in the refrigerator overnight before reheating.
Conclusion
After countless experiments in my Castleton kitchen, I’m thrilled to share this perfected Oreo mug cake that delivers on the promise of a quick, satisfying dessert without the disappointment of the viral 2-ingredient version. By adding just a few pantry staples, we’ve transformed this treat from a gummy disappointment to a genuinely delicious cake with proper texture and flavor depth.
What makes this recipe special is its reliability. The visual cues I’ve shared, from the proper batter consistency to the slightly underbaked appearance when it’s done, ensure success even for novice bakers. The flexibility to use various milk types means everyone can enjoy it, regardless of dietary preferences or restrictions.
Whether you’re satisfying a midnight chocolate craving, creating a quick dessert for unexpected guests, or making a fun cooking project with children (as I often do with my daughter Molly), this improved Oreo mug cake delivers restaurant-quality results with minimal effort. It proves that sometimes, adding just a few strategic ingredients makes all the difference between disappointment and delight. So grab your favorite mug, crush some Oreos, and treat yourself to a properly made mug cake that actually works every time.
Love this recipe? Follow us on Facebook and Pinterest and explore more creative ideas on our food blog!
Frequently Asked Questions
Why is my Oreo mug cake hard or rubbery?
A rubbery texture usually results from overmixing (which develops gluten) or overcooking. Mix just until ingredients are combined, and microwave until the center looks slightly underbaked – it will continue cooking from residual heat. Adding a small amount of baking powder helps create a fluffier texture. Different microwave powers also affect cooking time, so start checking early and adjust as needed.
Can I make this Oreo mug cake without milk?
Yes, you can substitute milk with water in a pinch, though the cake will be less rich. For better results, use plant-based alternatives like oat milk, almond milk, or soy milk – each creates slightly different textures, with oat milk producing the creamiest result closest to dairy milk. You could also try using a few tablespoons of yogurt thinned with water.
Do I need to remove the cream filling from the Oreos?
No! Leave the cream filling intact – it contributes sweetness and moisture to your mug cake. The filling melts during cooking and becomes part of the cake’s structure. Just crush the whole Oreos (filling and all) until they resemble coarse crumbs with some smaller pieces for texture.
Can I bake this in a standard oven instead of a microwave?
Absolutely. Transfer the prepared batter to an oven-safe ramekin and bake at 350°F (175°C) for about 15 minutes. The oven version will have a more traditional cake texture with a slight crust on top, though you’ll lose the gooey center that makes microwave mug cakes special. Remember that the total time including preheating will be around 25 minutes versus 3 minutes for the microwave version.
How do I prevent my mug cake from overflowing?
Always use a mug with at least 350ml capacity (about 1½ cups). The batter should fill the mug no more than halfway to allow room for rising. If overflow occurs, your mug is likely too small or you’re microwaving too long. For extra protection, place the mug on a microwave-safe plate to catch any potential overflow, and check the cake at 45-60 seconds before deciding if it needs more time.
Is this Oreo mug cake vegan-friendly?
Traditional Oreos are accidentally vegan (though manufactured in facilities that process milk), so the cookies themselves are plant-based. To make this mug cake vegan, simply use a plant-based milk like oat, soy, or almond milk. Oat milk works particularly well for creating a creamy texture. Just be aware that specialty Oreo flavors sometimes contain additional ingredients that may not be vegan, so check the packaging if you’re using flavored varieties.