No Egg Recipes – Delicious Cooking Without Eggs
Aquafaba mousse: a Foolproof Vegan Chocolate Mousse for Beginners
For Aquafaba mousse. Create cloudlike vegan chocolate mousse with chickpea water using Elsie's tested kitchen method. Perfect for families with allergies, this
I am Elsie Marlow, a home cook in Castleton in the Peak District, and I want you to have a reliably glossy, cloudlike Aquafaba mousse in your bowl by the end of this read. In my busy kitchen, driven by my daughter Molly’s egg allergy, I learned how to coax chickpea water into a silky, stable foam that folds with melted chocolate for an indulgent, dairy-free dessert everyone asks for. This post promises clear troubleshooting, sensory cues, and simple confidence so you can make an airy, deeply chocolate dessert with pantry-friendly ingredients.
- Texture target: Pale, glossy foam that folds into a silky, airy mousse
- Reliable swap/tool: Use room-temperature dark chocolate and a clean metal bowl for the best lift
- Make-ahead: Sets in the fridge overnight and holds texture for days when chilled
Table of Contents
Table of Contents
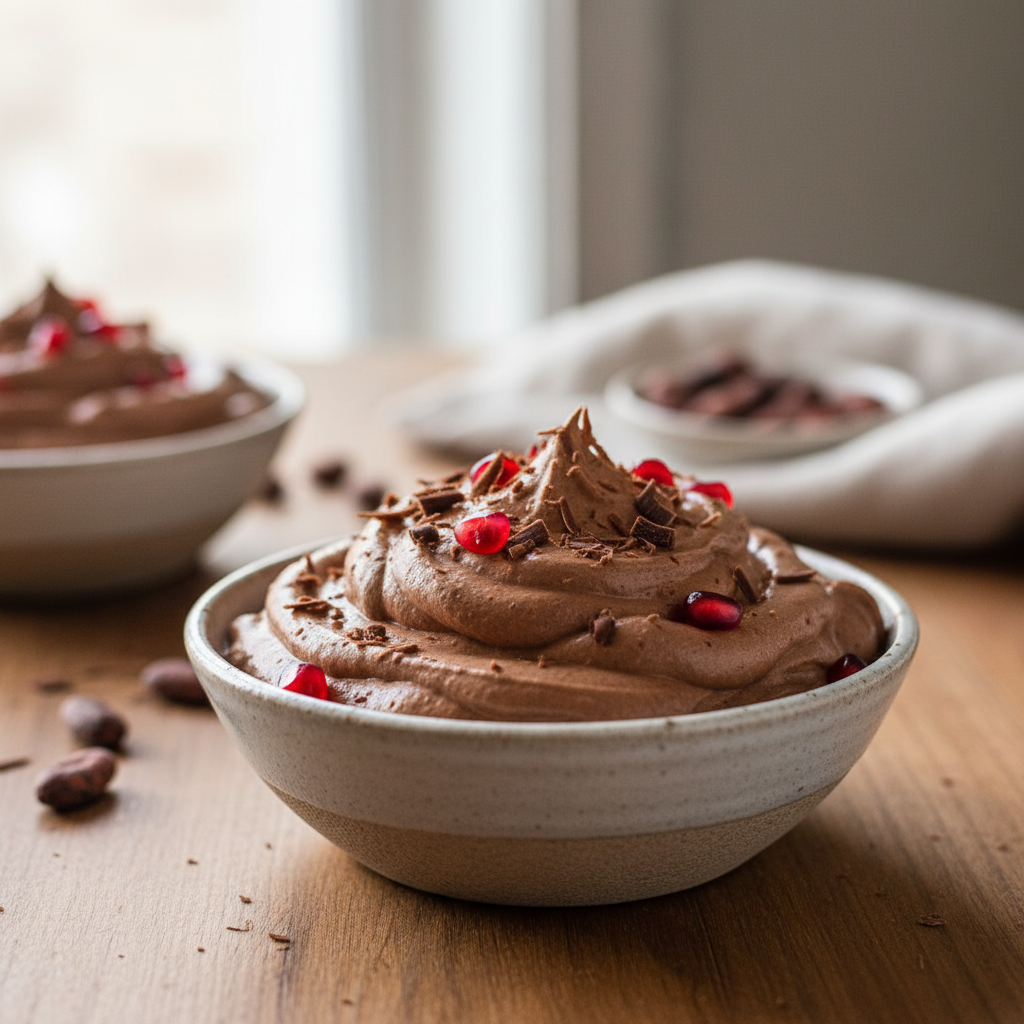
Fluffy Vegan Chocolate Mousse with Aquafaba
An easy, indulgent vegan chocolate mousse using aquafaba as an egg white substitute, perfect for vegans and those with egg allergies.
PREP TIME
20 mins
20 mins
COOK TIME
0 mins
0 mins
TOTAL TIME
20 mins
20 mins
Servings: 4 portions
Course: Snack
Cuisine: Vegan
Calories: 218
🥄 Ingredients
- ¾ cup / 180 ml room temperature aquafaba (from low-sodium canned chickpeas or home cooked)
- 1 teaspoon lemon juice or scant ½ teaspoon cream of tartar
- 5 oz / 140 g dark 70% cacao vegan chocolate
- 2 teaspoons / 10 g coconut oil
- 2 tablespoons / 25 g caster sugar (optional, adjust to taste)
- 1 tablespoon chocolate shavings (garnish)
- Handful of pomegranate seeds (garnish)
- Handful of chopped pistachios (garnish)
👩🍳 Method
- Place broken up chocolate and coconut oil in a glass or metal bowl suspended over a water bath. Ensure the bowl does not touch the water.
- Allow water to come to a simmer slowly, then turn heat off and let chocolate melt in residual heat.
- Once chocolate looks melted, give it a slow gentle stir. Remove from heat and allow to cool until liquid but not warm.
- Drain room temperature aquafaba into large grease-free glass bowl.
- Add acid (lemon juice or cream of tartar) to aquafaba to stabilize.
- Using electric whisk, whip aquafaba into stiff peaks (about 8 minutes). Test by inverting bowl – aquafaba should not move.
- Once stiff peaks form, add sugar gradually while whipping continuously. If peaks perish, whip until stiff again.
- Check that chocolate has cooled sufficiently (not warm to touch).
- Gently fold one-third of melted chocolate into whipped aquafaba using silicone spatula and folding motion.
- Continue adding chocolate in batches until fully incorporated. Mixture may deflate slightly but should remain bubbly.
- Divide mixture between 4 glasses, stirring gently between portions to distribute chocolate evenly.
- Give each mousse a gentle stir with toothpick to ensure even setting. Refrigerate overnight.
Notes: Mousse sets overnight in refrigerator. Check for stiff peaks by inverting bowl – aquafaba should not move. Use room temperature ingredients and grease-free equipment for best results.
Why This Recipe Works
I learned the hard way that the difference between a weepy dessert and a triumphant one is mostly about technique and small sensory checks. The method overview is simple: whip aquafaba until it reaches glossy, stable peaks, then temper in melted chocolate gently and fold to preserve volume. That single-paragraph method gives you the map; the rest of this article gives you the road signs and pothole warnings I discovered through repeated attempts.
The chemistry is forgiving when you respect foam structure. When the aquafaba is whipped to the right stage it feels tacky but not sticky to the touch, and the peaks look shiny, pale, and smooth rather than grainy. Tempering chocolate so it is pourable and just warm prevents fat separation when folded into the foam. Folding gently, lifting from the bottom and turning, keeps the mousse light and cloudlike.
I include sensory cues on what to watch for: a soft peak that droops slightly and then holds, a ribbon of mousse that settles slowly into a uniform surface, and a finished texture that is light but still spoon-coating. Over the years I learned to read these signs the same way I learned to know when bread dough is ready – once you can feel it, the results follow.
Ingredient Notes & Substitutions
I write this as someone who started swapping eggs for vegan options because Molly has an allergy, so accessibility and zero-waste mattered from the start. The primary ingredient that does the lifting here is the liquid from a can of chickpeas, commonly called aquafaba or chickpea water. Use the clear liquid that is relatively viscous, not the thick, starchy sludge that sometimes comes with home-cooked chickpeas. If you are making chickpeas from dry beans, reserve the cooking liquid and chill it so fat rises and any foam inhibitors can be skimmed off.
Chocolate choices matter for flavor and structure. A good dark chocolate that melts smoothly gives depth without needing dairy. If you prefer less intensity, use a slightly sweeter bar, but be mindful that sugar affects foam stability. For sweetening, granulated sugar is reliable because it dissolves quickly and helps stabilize the foam; however, you can experiment with powdered sugar or liquid sweeteners – expect subtle shifts in texture and whipping time. For a lower-sugar or alternative-sweetener route, use superfine alternatives and test whipping until you reach the sensory cues in this guide rather than relying on a timer.
For those who need additional stabilizers due to humidity or other variables, a small pinch of cream of tartar or a drop of vinegar or lemon juice can boost foam stability. These are optional and based on the specific batch of aquafaba you have, which varies from brand to brand and can even vary with how the can was processed. If a brand consistently underperforms, try another or make your own chickpea cooking liquid. Remember, the goal is an indulgent, accessible vegan chocolate mousse that uses what you might otherwise discard, and that zero-waste angle is central to why I keep using aquafaba in my kitchen.
Equipment Notes
You do not need exotic machines, but a few reliable tools make this reproducible. A sturdy electric mixer makes whipping faster and more consistent, though a handheld whisk and a steely arm will work if you don’t mind the effort. Use a clean metal or glass bowl for whipping; plastic can hold grease and quietly kill a foam. I learned that lesson the hard way when a previously trusted bowl yielded flat results – once I switched to a copper-plated bowl for a few batches I noticed faster lift. Copper is not required, but metal conducts a stable temperature and can aid in peak formation for aquafaba and other foams.
Other useful items include a heatproof bowl for melting chocolate and a spatula with a narrow edge to fold without deflating the mixture. Thermometers are optional; I rely on touch and visual cues for the chocolate. If you use a double boiler or a bowl over simmering water, keep the melted chocolate just warm and fluid, not hot – you want it pourable but not so hot that it relaxes the foam the moment it touches it.
Pro Tips & Troubleshooting
After many failed attempts and several batches that ran away from me, I collected these troubleshootings into a compact, practical checklist based on sensory signals rather than clocks. Start with a clean setup: bowls and whisks wiped free of any oil, and hands dry. If your foam refuses to form, check for grease first – even a thin film in the bowl can stop peak formation. If peaks form but collapse with folding, your chocolate is likely too hot or too much has been added at once. Warm chocolate gently and add in three small additions, folding each time to preserve volume.
Common fixes I use in my kitchen: if the foam is slow to lift, try colder (but not freezing) aquafaba and a chilled bowl; if the foam is airy but collapses after 10 minutes, a tiny pinch of acid or cream of tartar can help hold the structure; if the mousse tastes flat, increase the quality of chocolate rather than adding more sugar. Sensory cues I rely on include a glossy sheen on peaks, a faint resistance when the beater lifts out, and a texture that feels tacky but not sticky between fingertips.
Trust signal note: document your wins after failures. I save dated photos of batches that failed side-by-side with eventual successes. That record taught me how small changes – a different brand of canned chickpeas, a cooler kitchen, or a slightly different folding motion – produced predictable improvements. Use those photos and notes in your own practice; they are the shortest route from repeated fiascos to confident, repeatable mousse.
Variations & Flavor Twists
Once the basic technique is solid, the mousse becomes a playground. You can fold in a whisper of espresso to sharpen chocolate notes, stir in orange zest for a classic pairing, or fold in melted white chocolate for contrast – keeping in mind that different chocolates bring different textures. For a more decadent finish, layer the mousse with a simple crushed biscuit base or a scattering of toasted hazelnuts. If you want a fruit note, swirl through a cooked berry reduction that is cool and thick, not runny, to avoid collapsing the mousse.
For special diets and occasions, this formula adapts well. A spiced version with ground cinnamon and a touch of smoked salt brings depth for cooler months; a mint infusion gives a bright lift for summer. If you are aiming for a gluten-free or nut-free party dessert, stick to pure chocolate and fruit additions only. I often make a batch of plain chocolate mousse and then split it into jars – one with salted caramel folded through, another with a coffee reduction, and a third with toasted coconut. This keeps guests happy and lets me test small variations without wasting ingredients.
As you try twists, remember that flavor add-ins that are very wet or hot will relax the foam. Cool any liquid additions and thicken them if needed before folding. For texture contrasts, add crunchy toppings at serving time so the mousse remains airy. I keep a small box of toasted seeds and chopped chocolate shards for that final flourish.
Serving & Storage
I serve this mousse chilled in small ramekins or pretty glasses. The mousse sets into an indulgent, billowy structure that holds its shape on a spoon but still melts on the tongue. For presentation, a light dusting of cocoa or a shaving of chocolate makes a simple, elegant finish. If you want a glossy top, a thin layer of tempered chocolate poured on and chilled briefly creates a crisp shell that cracks to reveal the silky interior.
Storage is straightforward. The mousse is best chilled and will keep well in the refrigerator for several days if covered; the texture gently densifies over time but remains pleasant. For longer storage, portion into shallow containers to speed chilling and freeze in single-serve portions. Thaw overnight in the refrigerator. When thawed, the texture may be slightly looser than freshly made mousse but is still enjoyable, especially when given a gentle whisk or spooning right before serving. Avoid leaving it at room temperature for extended periods as the foam will relax and the chocolate may bloom.
Aquafaba mousse – Common Mistakes to Avoid
My early failures taught me a handful of mistakes that are easy to avoid. First, do not underestimate the damage of grease. I once tried whipping aquafaba in a bowl that had previously held olive oil – not a trace remained to the naked eye but the foam never formed. Second, do not add hot chocolate directly to the foam. I ruined a batch by pouring steaming chocolate straight in; it deflated the peaks instantly. Let the melted chocolate cool until it is merely warm and add it in stages.
Another frequent error is impatience with whipping. Aquafaba can be slower than egg whites, and old recipes that promise rapid peaks may mislead beginners. Whip until you see the sensory cues: glossy surfaces, a tacky but not sticky feel, and slow-holding peaks. Finally, avoid over-folding. Once the chocolate is incorporated, stop. Overworked mousse becomes dense rather than fluffy. These are retrievable mistakes – I recovered many batches with small adjustments – but if you get the basics right, you will avoid the most common pitfalls altogether.
Science Behind Aquafaba Foaming
Understanding why aquafaba foams helps you foresee problems. The chickpea liquid contains proteins and soluble fibers that behave similarly to egg whites when agitated. Mechanical whipping traps air and the proteins align at air-liquid interfaces, creating walls around the bubbles. This is why clean equipment and the right concentration of soluble solids matter – too thin a liquid yields unstable bubbles, too thick can be gummy. The proteins and carbohydrates interact with dissolved sugars and acids to determine final stability.
Temperature also plays a role. Cold air holds less moisture and the foam may be firmer when whipped in a cooler bowl. Conversely, warm conditions can make the foam lax. The melted chocolate adds fats and solids which change interfacial tension. That is why you temper and add slowly – the chocolate must integrate without disrupting the delicate protein film around each air pocket. Think of it as building a house of cards: the base must be steady before you add the upper layers.
Different brands of canned chickpeas or different batches of homemade cooking liquid will vary in protein and carbohydrate content. That variability explains why some jars whip faster. If a batch underperforms, either concentrate it gently by reducing on a low heat and chilling, or mix a slightly stronger batch in to achieve the right balance. With experience you learn to read the liquid and choose the best approach to coax reliable peaks.
Nutritional Benefits of Chickpea Water
Chickpea water is not only a zero-waste miracle, it has modest nutritional contributions too. It contains soluble proteins and some carbohydrates with negligible fat. The protein content provides the structural function in foams rather than delivering large amounts of protein per serving, but every bit helps when you make egg-free desserts. Because you are using what might otherwise be discarded, this recipe aligns with sustainable cooking practices and reduces food waste.
For those watching their diet, a mousse based on aquafaba and dark chocolate offers a dairy-free alternative that can be lower in saturated fat than traditional mousse made with cream and egg yolks. Calorie counts vary depending on chocolate and sweeteners used, so the dessert can be adapted to fit different dietary needs without losing the indulgent mouthfeel. If you need to reduce sugar, experiment with lower-sugar chocolate and alternative sweeteners, but test texture as these changes can subtly affect foam stability.
Beyond macronutrients, choosing to use pantry items more fully has environmental benefits. Using chickpea water means buying fewer single-use specialist ingredients and getting more value from a single can. For home cooks who care about both taste and impact, that combination is a compelling reason to keep this technique in your repertoire.
Cost-Effective Dessert Making
Part of why this recipe lives in my weekly rotation is its cost efficiency. A can of chickpeas yields liquid that would otherwise be dumped, and a modest bar of good chocolate transforms it into something celebratory. When I entertain, I make multiple small portions rather than an extravagant centerpiece – it stretches the chocolate further and gives each guest a perfectly portioned indulgence. Buying chocolate on sale and keeping a small stash of decent-quality bars saved for desserts makes this easy on the wallet.
Batching is another way to cut cost. Make a double batch of the mousse base and portion into single-serve containers. They keep well in the fridge or freezer and become an easy, impressive dessert with minimal last-minute work. The zero-waste angle reduces cost indirectly by using items already in your pantry. If you grow herbs or citrus, a sprig of fresh mint or a scrap of zest goes a long way for garnish without extra cost.
In my experience, simple techniques that emphasize good ingredients and careful method beat complicated, expensive recipes most weekends. This recipe is an example: a few accessible ingredients, attention to sensory detail, and a little practice deliver a restaurant-grade dessert without the price tag.
Conclusion
Making an indulgent, accessible chocolate mousse without eggs became my kitchen mission after Molly’s allergy sent us searching for reliable, delicious substitutes. I am Elsie Marlow, and I turn to aquafaba because it is forgiving, zero-waste, and genuinely delightful when you know the cues. The key lessons I want you to take are simple: respect clean equipment, watch the sensory signs of glossy peaks and a tacky but not sticky feel, add chocolate gently and cool, and fold with care. Those habits turn experiment into craft.
Start small, take photos of each attempt, and note what changed between batches. Celebrate the wins – even the modest ones – because they show progress. With a few pantry staples and these proven techniques, you will have a luscious, dairy-free dessert everyone can enjoy. Make it for your family, your guests, or for a quiet evening alone. It is a tiny act of culinary inclusion that tastes like celebration.
Love this recipe? Follow us on Facebook and Pinterest and explore more creative ideas on our food blog!
Frequently Asked Questions
How do I achieve stiff peaks with aquafaba?
Begin with cool aquafaba and a clean, grease-free metal or glass bowl. Use an electric mixer on medium-high and be patient, watching for glossy, pale peaks that hold shape. If peaks are slow, chill the bowl briefly or add a pinch of cream of tartar or an acid like lemon juice to stabilize the foam.
What are common reasons chocolate seizes in mousse?
Chocolate usually seizes when it meets too much water or extreme heat. Avoid adding hot liquids directly to chocolate and ensure any mix-ins are cool. Melt chocolate gently over simmering water or in short bursts in the microwave, stirring until just smooth and fluid before folding into foam.
Which chocolate types work best for a vegan mousse?
Use a good-quality dark chocolate that melts smoothly. Higher-cocoa chocolates provide richness without extra dairy. If you prefer a sweeter profile, choose a slightly sweeter dark chocolate rather than switching to milk-style bars, which often include dairy.
How should I store aquafaba-based mousse?
Chill the mousse in covered containers in the refrigerator; it keeps well for several days. For longer storage, freeze single-serve portions and thaw overnight in the refrigerator. Avoid leaving it at room temperature for long periods to prevent collapse.
What are the nutritional benefits of using aquafaba?
Aquafaba provides soluble proteins and carbohydrates and is a low-fat, zero-waste option compared with traditional egg-based mousses. It offers a dairy-free route to a fluffy dessert and reduces food waste by using the chickpea liquid that might otherwise be discarded.
Can I use alternatives to sugar in vegan mousse?
Yes, alternatives like superfine sweeteners or liquid sweeteners can be used, but they may change whipping time and foam stability. Test substitutions in small batches and rely on sensory cues rather than fixed timings to judge readiness.
How does aquafaba differ from egg white mousse?
Aquafaba mimics egg whites in its ability to trap air and form stable foams due to soluble proteins and fibers, but its composition is different, leading to slightly different whipping times and sensitivities. Aquafaba is also plant-based and suitable for those avoiding eggs or dairy.