No Egg Recipes – Delicious Cooking Without Eggs
Simple, Customizable oreo and cake ice cream for Summer Parties
Oreo and Cake Ice Cream, an easy, no-bake crowd-pleaser tested in a home kitchen with vegan and gluten-free options. Ready in minutes? Discover the recipe.
Introduction
Hi, I’m Elsie Marlow, a home cook from Castleton, and I love turning busy afternoons into memorable treats for my family. This recipe is my easy, no-fuss answer when my daughter Molly and I want something festive but egg-free and stress-free. If you searched for Oreo and cake ice cream, you’re in the right place. I’ll walk you through a customizable, no-bake Oreo ice cream cake that works for vegans, gluten-free eaters, and anyone who prefers a simple dessert with maximum payoff.
Table of Contents
Table of Contents
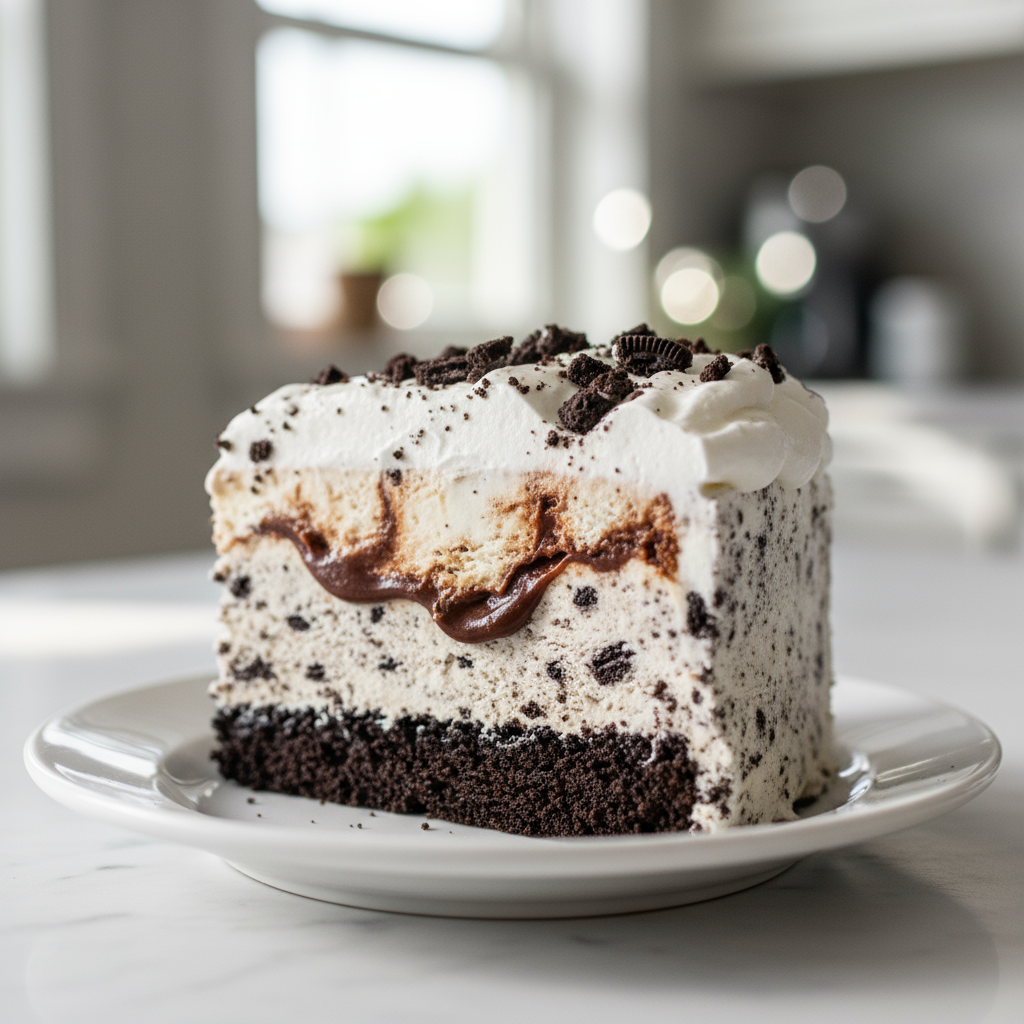
No-Bake Oreo Ice Cream Cake
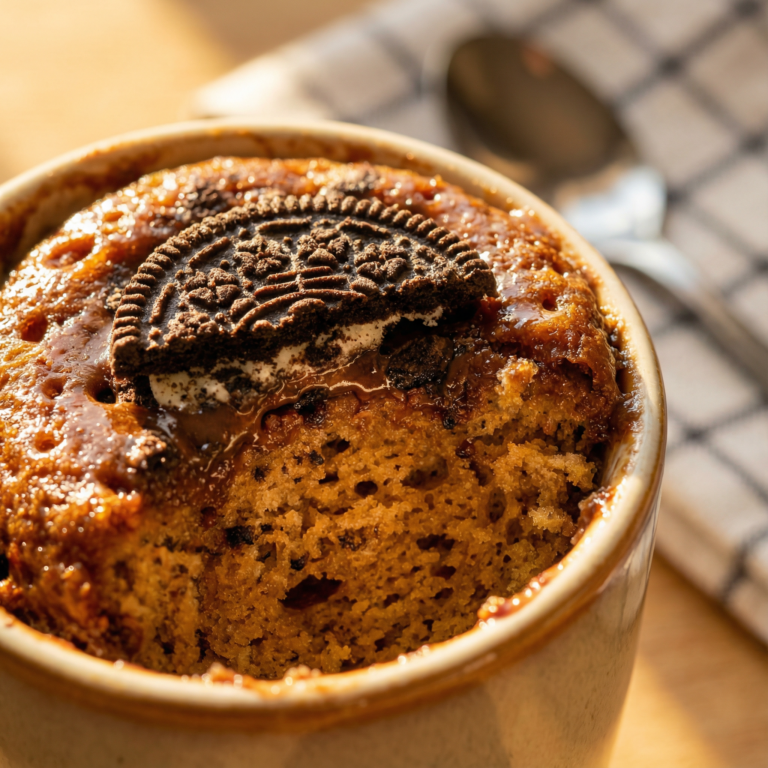
Indulge in this incredibly easy, no-bake Oreo ice cream cake featuring layers of crunchy Oreo crust, creamy cookies and cream ice cream, luscious hot fudge, and fluffy whipped topping.
PREP TIME
20 mins
20 mins
COOK TIME
0 mins
0 mins
TOTAL TIME
150 mins
150 mins
Servings: 12 servings
Course: Snack
Cuisine: American
Calories: 606
🥄 Ingredients
- 538 grams (19 ounces) Oreo cookies
- 85 grams (6 tablespoons) unsalted vegan butter, melted
- 1.89 liters (½ gallon) cookies and cream ice cream, softened
- 425 grams (15 ounces) vegan hot fudge sauce, or homemade vegan hot fudge
- 227 grams (8 ounces) vegan whipped cream, room temperature
- Oreos, crushed for optional garnish
👩🍳 Method
- First, line a 9 inch by 13 inch pan with parchment paper, allowing some overhang on the sides for easy removal. Set aside.
- Add the 538 grams of Oreo cookies to a food processor and process until finely crumbly. Alternatively, place them in a sturdy plastic baggie and crush them with a rolling pin.
- Pour in the 85 grams of melted vegan butter into the crushed Oreos. Pulse or mix to combine thoroughly until the mixture resembles wet sand.
- Press this Oreo and vegan butter mixture firmly and evenly into the bottom of the parchment-lined pan to form the crust.
- Scoop the softened 1.89 liters of cookies and cream ice cream onto the Oreo crust. Use a spatula to smooth it into an even layer. Place plastic wrap directly over the ice cream layer to prevent ice crystals, then freeze for at least 1 hour.
- Remove the pan from the freezer. Pour the 425 grams of vegan hot fudge sauce evenly over the frozen ice cream layer. If the hot fudge is too thick, microwave it for 15 to 20 seconds to make it easier to pour and swirl. Gently swirl if desired for a marbled effect.
- Cover the pan again and return it to the freezer for another 1 hour to allow the fudge layer to set.
- Remove the pan from the freezer. Gently spread the 227 grams of vegan whipped cream over the fudge layer, ensuring it forms one even blanket. Garnish with some additional crushed Oreos or vegan chocolate chips if preferred. Return the pan to the freezer for a final freeze of at least 30 minutes.
- Finally, remove the cake from the freezer. Let it sit at room temperature for about 5-10 minutes before serving. Use the parchment paper overhang to lift the cake out of the pan. Cut into squares with a sharp knife (running it under hot water and wiping it clean between cuts helps) and serve immediately.
Notes: Ensure ice cream is softened but not melted for easy spreading. Freeze each layer thoroughly to prevent muddling. Use a warm, sharp knife for clean slices. Store covered in the freezer for up to one month.
Why This No-Bake Oreo Ice Cream Cake is Your New Favorite Dessert
I make this cake whenever I want a crowd-pleaser that does not demand an oven, complicated timing, or special techniques. The texture contrast is what hooks people: a satisfying, crunchy chocolate cookie base under a plush, scoopable cookies-and-cream layer, a ribbon of sticky fudge, and a cloud of whipped topping. I love how the flavors stay familiar but feel elevated when you assemble them into layers.
It’s wildly forgiving, which means you can prepare big parts ahead, and it serves easily at parties – just lift, slice, and hand out squares.
Because the assembly is straightforward, this recipe is great for family helpers. My Molly helps press the crust and scatter crushed cookies for garnish. It’s also a brilliant alternative to heavier, baked cakes when the weather calls for something cool. I often describe it as the easiest no-bake Oreo dessert you’ll return to all summer.
Ingredient Notes & Smart Substitutions
I write these notes from a lot of trial and error, testing different cookie types, butter substitutes, and dairy-free options, so you do not have to. The classic version calls for chocolate sandwich cookies for the crust and a cookies-and-cream ice cream as the main layer. For vegan versions, choose plant-based ice cream, vegan hot fudge, and vegan whipped topping.
If you need gluten-free, swap the sandwich cookies for certified gluten-free chocolate sandwich cookies; that change keeps the flavor while making the dessert safe for guests with gluten intolerance. When I first made a gluten-free version, I crushed the cookies a little finer so the crust packed together well, and that solved the problem of a crumbly base.
If you want lower sugar, use a reduced-sugar ice cream or a lighter chocolate sauce, though keep in mind texture will differ. For richer chocolate, use a darker hot fudge or add a thin ganache layer before the whipped topping. If your vegan butter is too soft, chill it briefly so the crust holds together when pressed. I recommend softening, but not melting, the ice cream you plan to use – it should spread without collapsing the crust.
One practical tip from my years of cooking egg-free treats: always check labels for hidden ingredients if you need strict vegan or gluten-free compliance. And when photographing your finished cake, include process shots – the pressed crust, the smoothed ice cream, and the fudge pour – to show you did every step with care.
Essential Equipment for a Perfect Ice Cream Cake
You do not need fancy tools to make this dessert, but a few items make the job simpler and neater. I always line my 9-inch by 13-inch pan with parchment that overhangs the sides, which makes lifting the cake out effortless. A food processor makes quick work of crushing sandwich cookies; if you do not have one, use a sturdy plastic bag and a rolling pin. A flexible spatula helps smooth the softened ice cream evenly, and a small offset spatula is handy for the whipped topping. A microwave-safe bowl speeds up warming the fudge a few seconds for easier pouring.
Method overview: soften the ice cream just enough to spread, press the cookie-butter mixture into a firm crust, freeze until firm, pour warmed fudge and re-freeze, then top with whipped cream and a final quick freeze. Keeping each layer firm between steps prevents blending of layers and gives the clean lines we all love in a slice. I keep cooling racks nearby and label pans when I’m preparing multiples for big gatherings.
Pro Tips for Layering and Freezing Success
Layering an ice cream cake so it slices cleanly is about temperature control and patience. Always give the crust a few minutes in the freezer before adding softened ice cream, especially if you pressed it firmly – this helps it set and support the weight. When spreading softened ice cream, work quickly and use a thin layer of plastic wrap pressed onto the ice cream surface to prevent ice crystals from forming while the pan returns to the freezer. Freeze each layer until solid – I usually do the ice cream layer for at least one hour, the fudge layer for another hour, and a final 30 to 60 minutes after the whipped topping.
Running a sharp knife under hot water between cuts is the key to neat slices. Wipe the blade dry between slices to avoid dragging soft bits across the next piece. If you need to speed up service, pull the cake from the freezer 5 to 10 minutes before serving to soften slightly at the edges; the center should still be firm. For transport, keep the cake in the coldest part of your cooler and minimize how often you open it.
One lesson I learned the hard way: do not let the ice cream fully melt when you soften it. It should be spreadable but still cold. If it gets too soft, pop it back into the freezer for 10 to 20 minutes until it firms up again. This keeps the layers distinct and prevents a soggy crust.
Creative Variations and Flavor Twists
Once you have the basic template, the variations are where this dessert becomes truly yours. Swap the cookies-and-cream ice cream for chocolate, peanut butter, mint chip, or a fruit-forward flavor like strawberry for a bright twist. For a crowd-pleasing upgrade, layer in chopped toasted nuts between the crust and ice cream, or fold crushed chocolate candies into the whipped topping for an extra crunch. A chocolate lover’s version uses chocolate ice cream and a ganache layer under the whipped cream for depth.
For a vegan or allergy-friendly take, use plant-based ice cream and vegan hot fudge; I make a coconut-based ganache when I want a silky chocolate note. If you want a smaller cake, halve the layers and use an 8×8 pan, or make individual serving jars for a playful presentation. I’ve also made this as a frozen oreo recipe in cupcake molds for single-serve bites that freeze faster and are perfect for picnics.
Keep variety simple by swapping one component at a time so the results remain predictable. For example, try an easy ice cream cake switch by using salted caramel sauce instead of hot fudge, or add a sprinkle of espresso powder to the crust for subtle mocha notes. Each small change creates a new version worth serving again.
Serving Suggestions & Simple Storage Tips
Serve slices on chilled plates if you can; they help maintain the cake’s shape during presentation. Garnish with extra crushed cookies, fresh berries, or a drizzle of warmed sauce for a restaurant-style finish. If you’re serving a crowd, pre-slice the cake while it is just slightly softened, and then blitz the knife under hot water for each cut to keep edges clean.
To store, keep the cake covered in an airtight container or tightly wrapped in plastic in the freezer for up to one month. If the whipped topping softens or gathers freezer crystals, smooth lightly with a spatula after a brief standing at room temperature, but do not let it sit long. Forthe best texture, I recommend serving within two weeks. If you need to travel with the cake, pack it in a cooler with ice packs and minimize time out of refrigeration.
When I save leftovers, I often scoop pieces into small containers to enjoy later as a quick frozen treat. Just remember, the sooner you eat it, the closer the texture will be to freshly made.
Common Mistakes to Avoid for a Flawless Dessert
I’ve made this cake dozens of times and made every mistake, so you do not have to. The most frequent error is letting the ice cream soften to a puddle before spreading. If that happens, refreeze the ice cream until it firms up slightly, then try again. Another mistake is not freezing each layer long enough. Rushing the freeze time leads to layers that blur together and a crust that falls apart when cutting. Patience here pays off.
A crumbly crust usually means the cookie crumbs were not fine enough, or the butter substitute was too cold, or too little. Pulse the cookies until they resemble fine sand, and add just enough melted butter or vegan butter to hold the crumbs when pressed. If your whipped topping weeps after freezing, it was likely too soft when applied, or it contained stabilizers that reacted oddly after freezing. Use a stable, high-quality whipped topping and apply it to a fully firmed fudge layer.
Finally, avoid using the exact same spoon for tasting and stirring if you’re testing vegan or allergy-friendly batches for guests with restrictions. Cross-contact can ruin a perfectly planned treat. I always have separate utensils clearly labeled when I’m preparing allergen-free desserts, a habit born from feeding Molly safely for years.
Conclusion
This no-bake Oreo ice cream cake is one of my favorite ways to bring people together without a complicated recipe. It’s adaptable – vegan, gluten-free, or indulgent – and it handles well for parties and hot days. My best advice is to plan the freezes in stages, keep your layers firm between steps, and play with one variation at a time. If you try it, take photos at each step – the pressed crust, the poured fudge, and the first slice – and share those photos with your helpers. Cooking egg-free for Molly taught me that deliciousness should be inclusive, and this cake is one of our happy, easy wins.
If you have questions about substitutions or timing for a party-size cake, I’d love to hear how you plan to adapt it. Happy assembling, and enjoy every cool, crunchy, creamy bite.
Love this recipe? Follow us on Facebook and Pinterest and explore more creative ideas on our food blog!
Frequently Asked Questions
How do you make an ice cream cake without it melting?
Work in short windows and keep the ice cream only softened, not melted. Freeze each layer until solid before adding the next, and return the cake to the coldest part of your freezer between steps. For serving, pull the cake out 5 to 10 minutes before slicing so the edges soften but the center remains firm.
Can you make an Oreo ice cream cake ahead of time?
Yes, you can assemble the cake up to two weeks ahead and store it tightly wrapped in the freezer. For best texture, serve within two weeks, and keep it covered to prevent freezer burn and ice crystals.
What kind of ice cream is best for an ice cream cake?
Use a scoopable, flavorful ice cream that softens evenly. Cookies-and-cream is classic for this cake, but chocolate, mint chip, or plant-based alternatives work well. Avoid ultra-soft churned varieties that melt too quickly when softened.
How do you cut an ice cream cake cleanly?
Run a sharp knife under hot water, dry it, then cut in a single smooth motion. Wipe the blade between cuts to keep slices tidy. Chill plates beforehand to help slices hold their shape.
What toppings can be added to an Oreo ice cream cake?
Crushed cookies, fresh berries, chopped nuts, chocolate shavings, or a drizzle of warmed caramel or extra fudge are all great. Add garnishes just before serving for the best appearance.
Are there dairy-free options for Oreo ice cream cake?
Yes, use dairy-free ice cream, vegan hot fudge, and vegan whipped topping. Choose certified vegan sandwich cookies or check labels, and follow the same assembly and freezing steps.
How long does an Oreo ice cream cake last in the freezer?
Stored airtight, the cake keeps well for up to one month, though quality is best within two weeks. Wrap tightly to prevent freezer burn and ice crystal formation.