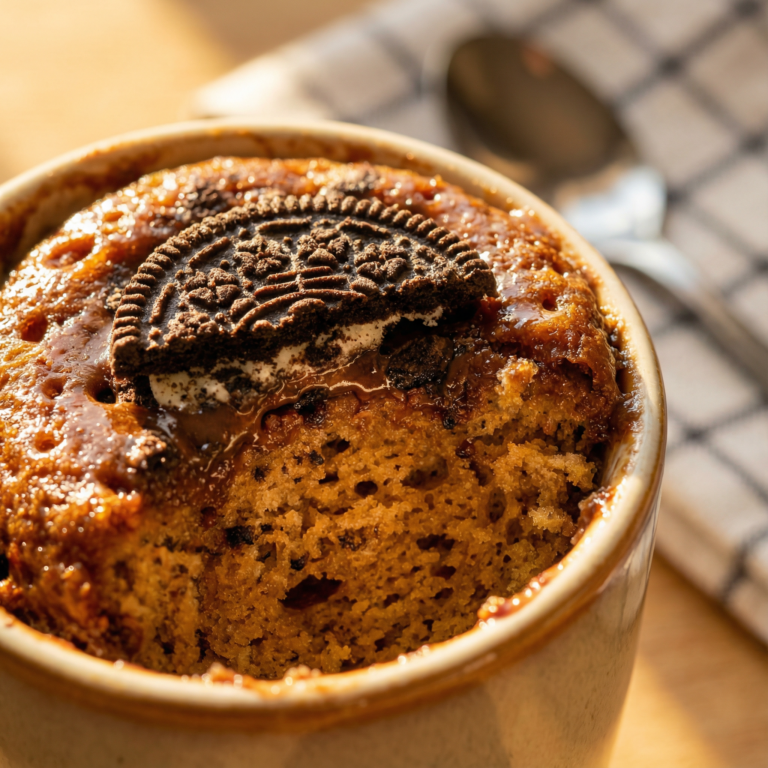
No Egg Recipes – Delicious Cooking Without Eggs
Chocolate Raspberry Ganache Cake: A Decadent Homemade Delight
Master Elsie's decadent Chocolate Raspberry Ganache Cake! Perfect rich chocolate, tart raspberries & silky ganache, perfected through years of trials. Get
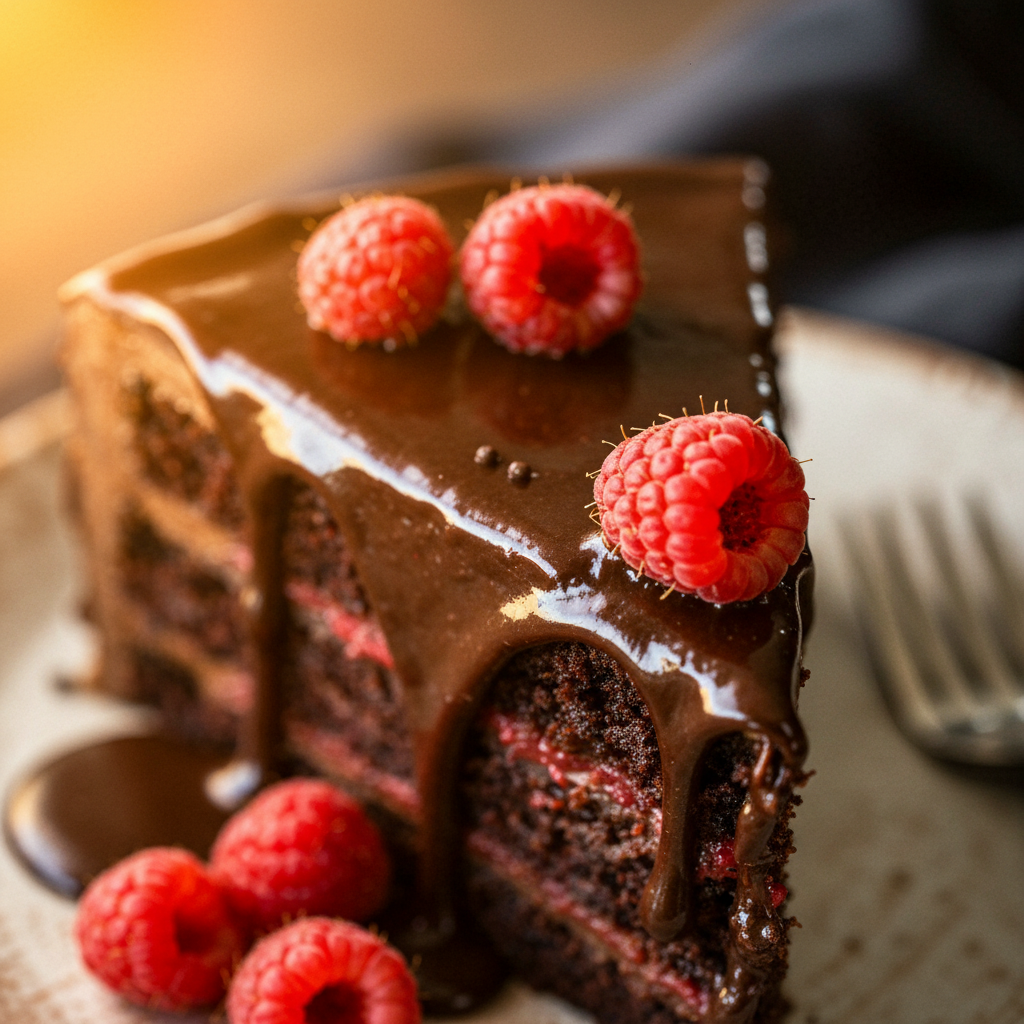
My Chocolate Raspberry Ganache Cake has become my signature dessert for good reason. The rich chocolate layers complemented by tart raspberry and silky ganache create a professional-looking cake that’s actually achievable in a home kitchen. I’ve perfected this recipe through countless trials in my Castleton kitchen, adjusting ratios and techniques until every element worked in harmony. Even without eggs for my daughter Molly, this cake delivers on both presentation and flavor.
- Texture target: Moist cake with velvety ganache that cuts cleanly without crumbling
- Reliable tool: Digital thermometer for perfect ganache temperature (32-34°C/90-94°F)
- Make-ahead: Cake layers can be frozen for up to 1 month; assembled cake stays fresh for 3 days refrigerated
TOC
Table of Contents
Chocolate Raspberry Ganache Cake
This decadent chocolate raspberry ganache cake features moist chocolate cake layers, a rich chocolate ganache filling, and a bright, tangy raspberry topping, making it a perfect dessert for any celebration. This recipe has been perfected through extensive testing, ensuring a beautiful and delicious outcome every time.
PREP TIME
60 mins
60 mins
COOK TIME
35 mins
35 mins
TOTAL TIME
275 mins
275 mins
Servings: 1 (8-inch) round cake, 12 servings
Course: Snack
Cuisine: American
Calories: 480
🥄 Ingredients
- 1 cup (226 g) unsalted vegan butter, softened
- 2 cups (400 g) granulated sugar
- 4 large vegan eggs (follow package directions for powder or liquid equivalent)
- 2 teaspoons vanilla extract
- 2 cups (250 g) all-purpose flour
- ¾ cup (75 g) unsweetened cocoa powder
- 2 teaspoons baking soda
- 1 teaspoon salt
- 1 cup (240 ml) dairy-free buttermilk (1 cup dairy-free milk + 1 tablespoon lemon juice or apple cider vinegar, let sit 5 minutes)
- 1 cup (240 ml) hot water
- 10 ounces (280 g) dairy-free semi-sweet chocolate chips or chopped dairy-free chocolate
- 1 cup (240 ml) full-fat coconut milk (or dairy-free heavy cream)
- 6 ounces (170 g) fresh or frozen raspberries, divided
- 2 tablespoons (25 g) granulated sugar (for raspberry topping)
- 1 tablespoon (7 g) cornstarch
- 1 tablespoon (15 ml) water
👩🍳 Method
- **For the Vegan Chocolate Cake:**
- 1. Preheat oven to 350°F (175°C). Grease and flour two 8-inch (20 cm) round cake pans, lining the bottoms with parchment paper.
- 2. In a large bowl, cream together the softened unsalted vegan butter and 2 cups (400 g) granulated sugar until light and fluffy. Add the vegan eggs and 2 teaspoons vanilla extract, beating until well combined.
- 3. In a separate bowl, whisk together the 2 cups (250 g) all-purpose flour, ¾ cup (75 g) unsweetened cocoa powder, 2 teaspoons baking soda, and 1 teaspoon salt.
- 4. Gradually add the dry ingredients to the wet ingredients, alternating with the 1 cup (240 ml) dairy-free buttermilk, beginning and ending with the dry ingredients. Mix until just combined.
- 5. Carefully stir in the 1 cup (240 ml) hot water until the batter is smooth. The batter will be thin.
- 6. Divide the batter evenly between the prepared cake pans. Bake for 30-35 minutes, or until a wooden skewer inserted into the center comes out with moist crumbs. (Elsie’s Tip: Overmixing leads to tough cakes! Mix until just combined to keep your layers tender.)
- 7. Let the cakes cool in the pans for 10 minutes before inverting them onto a wire rack to cool completely. (Elsie’s Tip: Patience is key here! A warm cake means melted ganache.)
- **For the Raspberry Filling:**
- 8. In a small saucepan, combine 3 ounces (85 g) of the fresh or frozen raspberries (reserving the rest for garnish/ganache), 2 tablespoons (25 g) granulated sugar, and 1 tablespoon (15 ml) water. Bring to a simmer over medium heat, mashing the raspberries gently.
- 9. In a small bowl, whisk together the 1 tablespoon (7 g) cornstarch with 1 tablespoon (15 ml) water to create a slurry. Stir the slurry into the simmering raspberry mixture and cook, stirring constantly, until thickened, about 1-2 minutes. Remove from heat and let cool completely. (Elsie’s Tip: A well-cooled filling prevents a soggy cake!)
- **For the Vegan Chocolate Ganache:**
- 10. Place the 10 ounces (280 g) dairy-free semi-sweet chocolate chips or chopped dairy-free chocolate in a heatproof bowl. In a small saucepan, heat the 1 cup (240 ml) full-fat coconut milk (or dairy-free heavy cream) until just simmering. Remove from heat and immediately pour over the chocolate.
- 11. Let stand for 5 minutes, then whisk gently starting from the center until smooth and glossy. If desired, stir in 3 ounces (85 g) of the remaining fresh raspberries for a chunky raspberry ganache. Let the ganache cool at room temperature, stirring occasionally, until it reaches a spreadable consistency, about 1-2 hours. (Elsie’s Tip: Overheating the cream can make ganache split. Just a simmer will do!)
- **Assembly:**
- 12. Once the cake layers and raspberry filling are completely cool, place one cake layer on a serving platter. Spread the raspberry filling evenly over the top.
- 13. Top with the second cake layer. Pour about half of the chocolate ganache over the top, letting it drip down the sides. Use an offset spatula to smooth the top and sides.
- 14. Let the ganache set slightly, then pour the remaining ganache over the cake, ensuring even coverage. (Elsie’s Tip: A slight chill in the fridge for 15-20 minutes between ganache layers helps achieve cleaner drips.)
- 15. Garnish with the remaining 3 ounces (85 g) fresh raspberries (and optional chocolate shavings) before serving.
- 16. Serve at room temperature and enjoy this beautiful Chocolate Raspberry Ganache Cake!
- 17. Store any leftover cake in an airtight container in the refrigerator for up to 3 days. Let come to room temperature before serving.
Notes: For best results, allow the cake layers to cool completely before assembling to prevent the ganache from melting. The ganache will firm up as it chills; if it becomes too stiff to spread, microwave it in 15-second intervals, stirring in between, until it reaches a spreadable consistency. Store the assembled cake in an airtight container in the refrigerator for up to 3 days. Bring to room temperature before serving for the best texture.
Why This Chocolate Raspberry Ganache Cake Recipe Works
After years of tweaking this recipe, I’ve identified exactly what makes this chocolate berry cake stand out. The secret lies in the balance. I’ve found that using both cocoa powder and melted chocolate creates the perfect depth of flavor while maintaining ideal moisture. The raspberry component comes in three forms: fresh berries between layers, strained puree in the ganache, and a subtle hint in the cake itself.
The ganache uses a higher ratio of chocolate to cream than most recipes (2:1 rather than 1:1), creating a firmer finish that holds its shape beautifully when sliced. I’ve discovered that adding a small amount of corn syrup prevents crystallization, resulting in that professional sheen you see in bakery windows.
Temperature control is non-negotiable here. When I first started making ganache cakes, my impatience led to countless failures: seized chocolate, grainy textures, and runny frostings. Now I use precise temperatures for both the cream and chocolate, and the results are consistently perfect. This method creates a dessert that tastes complex but follows a straightforward process.
Ingredient Notes & Substitutions
The quality of chocolate dramatically affects your ganache cake. I recommend using baking chocolate with 60-70% cocoa content rather than chocolate chips, which contain stabilizers that can affect melting. For my family, I use Ghirardelli or Valrhona with consistent results. If you need a budget-friendly option, Baker’s chocolate works well too.
For raspberries, fresh is ideal, but frozen works wonderfully in the puree and filling. Just be sure to thoroughly drain thawed berries to prevent excess moisture. When fresh berries aren’t in season, I’ve found that freeze-dried raspberries ground into powder make an excellent flavor booster for the cake batter.
Heavy cream should have at least 36% fat content for the ganache to set properly. In the UK where I live, I use double cream. For dairy-free needs, full-fat coconut cream (not milk) creates a ganache that sets nearly as well as traditional cream, though it adds a subtle coconut note that actually complements the chocolate beautifully.
For the egg replacer in the cake, I’ve tested extensively and find that a combination of yogurt (1/4 cup or 60g per egg) plus 1/4 teaspoon additional baking powder works perfectly in this recipe, maintaining moisture without compromising structure.
The small amount of espresso powder is optional but enhances the chocolate flavor without adding coffee taste. If you don’t have it on hand, a tablespoon of strong brewed coffee works similarly.
Equipment Notes
After numerous cake disasters, I’ve learned that having the right tools makes all the difference when creating a chocolate raspberry ganache masterpiece. First, invest in good quality round cake pans, preferably 8-inch (20cm) with straight sides. I line both the bottom and sides with parchment for easy release, a trick I learned after one heartbreaking cake collapse.
A digital food thermometer has been my ganache game-changer. Before I started temperature testing, my ganache was inconsistent, sometimes too runny to stay on the cake and other times too stiff to spread. Now I heat cream to exactly 90°C (194°F) and cool my ganache to 32-34°C (90-94°F) before using it.
An offset spatula creates those smooth professional sides that impressed my daughter’s friends at her birthday party. When I first attempted this cake with a butter knife, the results were noticeably amateur. The long, flexible blade of an offset spatula gives you better control and reach.
For the raspberry puree, a fine-mesh sieve is essential to remove seeds. I once skipped this step thinking the texture would be fine, but the seeds were distracting in the otherwise silky ganache. A food processor also helps achieve the smoothest puree before straining.
A rotating cake stand isn’t absolutely necessary, but it significantly improves your ganache application. I managed without one for years, but when I finally purchased one, the difference in my finished cakes was immediately apparent.
Mastering the Chocolate Ganache: Secrets for Success
The heart of this dessert is undoubtedly the ganache, and mastering it took me numerous failed attempts. The perfect ganache begins with chopping the chocolate very finely. When I first started, I’d leave pieces too large, resulting in unmelted chunks that ruined the smooth texture. Now I aim for pieces no larger than a small pea, which melt quickly and evenly.
Temperature control is critical. Heat the cream just until bubbles form around the edges (90°C/194°F), then immediately pour over the chocolate. I always let it sit undisturbed for a full 5 minutes before stirring, which prevents seizing. Stir from the center outward in concentric circles rather than vigorously whisking, which can introduce air bubbles that later show on your cake surface.
For the raspberry-infused ganache, I strain the puree twice – once to remove seeds, then again when combining with the ganache to ensure absolute smoothness. This extra step makes a noticeable difference in the final texture.
The consistency stages of ganache confused me until I learned to recognize them properly. After mixing, your ganache will be quite thin. At room temperature, it takes approximately 30-45 minutes to reach the perfect spreading consistency, depending on your kitchen temperature. It should coat the back of a spoon and slowly drip off, not run off in a stream. If you’re in a hurry (as I often am), you can speed this process by placing the bowl over an ice bath and stirring constantly, but watch carefully as it can firm up suddenly.
When applying the ganache to your cake, work with confidence and adequate quantity. I always make about 20% more ganache than I think I’ll need to ensure I have enough for generous coverage and decorative touches.
Harmonizing Raspberry and Chocolate Flavors
The magic of this cake lies in the perfect balance between rich chocolate and bright raspberry notes. My early attempts often ended up either too sweet or overwhelmingly tart. Through trial and error, I’ve discovered that layering the raspberry flavor in different forms creates complexity without dominating.
For the filling between cake layers, I combine fresh raspberries with a thin layer of plain ganache. The berries should be gently pressed into the ganache but remain whole, creating pockets of intense flavor that burst when you take a bite. When teaching my neighbor to make this cake, she crushed the berries completely, which resulted in soggy cake layers. The intact berries provide both flavor and textural contrast.
In the raspberry ganache layer, strain the puree meticulously to remove all seeds. I recommend reducing the puree slightly (about 5 minutes of simmering) to concentrate the flavor and remove excess water that could prevent proper setting. Start with just 2-3 tablespoons of puree per cup of ganache and adjust to taste. The raspberry flavor will actually intensify as the cake rests.
The acidity of raspberries beautifully cuts through the richness of chocolate. I’ve found that adding a tiny pinch of salt to both the cake batter and ganache enhances this interplay, making both flavors more vibrant. A small amount (1/4 teaspoon) of almond extract in the cake batter also mysteriously intensifies the raspberry notes without being detectable itself.
For decorating, I reserve a few tablespoons of plain ganache to create contrast against the raspberry-tinted version. A simple pattern of dots or swirls of the darker chocolate against the reddish ganache creates a professional appearance with minimal effort.
Troubleshooting Your Chocolate Raspberry Ganache Cake
Even with the best intentions, challenges can arise. When my ganache has seized (turned grainy and separated), I’ve salvaged it by gently warming it over a double boiler while adding 1-2 teaspoons of warm cream and stirring constantly until smooth. Patience is crucial during this rescue operation; aggressive heat will only make matters worse.
If your ganache is too runny even after cooling, the ratio of chocolate to cream was likely off. You can fix this by melting additional chocolate separately and gradually incorporating it into the warm ganache. Start with 2 ounces (56g) of additional chocolate for every cup of runny ganache.
Conversely, if your ganache has become too firm to spread, warm it gently over a double boiler or in 5-second microwave intervals, stirring between each until it reaches spreading consistency. I’ve learned this lesson after impatiently refrigerating ganache to speed setting, only to end up with a texture more like fudge than frosting.
Sinking cake layers usually indicate underbaking. My foolproof test is to press the center gently; it should spring back completely. If your finger leaves an indentation, give it another 3-5 minutes in the oven. Also, never assemble the cake until layers are completely cool; even slight warmth will soften the ganache too much.
For raspberry bleeding into the ganache (creating unattractive streaks), ensure your puree isn’t too watery and that your ganache has cooled sufficiently before incorporation. Warming the puree slightly before adding it to the ganache also helps it integrate more smoothly.
If cake layers slide during assembly (a disaster I’ve faced more than once), insert 3-4 wooden skewers vertically through all layers to stabilize while the ganache sets, then remove them before serving. Refrigerating the assembled cake for 20 minutes between layers can also prevent shifting.
Variations & Flavor Twists
While the classic chocolate raspberry pairing is divine, I’ve experimented with numerous variations over the years. For a more intense berry experience, try blackberry instead of raspberry. The process is identical, but the deeper, earthy notes of blackberry create an interesting contrast with the chocolate. My daughter’s friend, who claimed not to like raspberries, requested this version for her birthday after tasting it at our house.
For a festive holiday version, I add 1/2 teaspoon of peppermint extract to the ganache and sprinkle crushed candy canes on top. The cooling mint with rich chocolate and subtle berry creates a memorable dessert that’s become our Christmas tradition.
Coffee lovers in my family enjoy when I add 2 tablespoons of espresso powder instead of just the hint in the original recipe. This creates a mocha-raspberry effect that’s particularly good with dark chocolate (70% or higher).
For special occasions, I’ve created a chocolate-raspberry-hazelnut version by adding 1/3 cup (80g) of hazelnut spread to the ganache and sprinkling toasted chopped hazelnuts between the layers along with the raspberries. The nuttiness adds another dimension that elevates the cake to restaurant quality.
When serving adults, a tablespoon of raspberry liqueur or Grand Marnier added to both the cake batter and ganache introduces a sophisticated flavor profile. Just be sure to add the alcohol after removing mixtures from heat to preserve the delicate flavor compounds.
For a lighter summer version, I sometimes replace one of the chocolate cake layers with a vanilla sponge, creating a striking visual contrast when sliced and a more delicate flavor balance that showcases the raspberries beautifully.
Serving & Storage Tips
This chocolate raspberry creation truly shines when served at the right temperature. Remove the cake from the refrigerator 30-45 minutes before serving to allow the ganache to soften slightly and the flavors to fully express themselves. When I’ve served it straight from the fridge, the ganache has a waxy texture and subdued flavor compared to the melt-in-your-mouth experience at room temperature.
For clean slices that showcase the beautiful layers, warm your knife in hot water, wipe it dry, and cut with a single downward motion rather than sawing. Clean and rewarm the knife between each slice for photo-worthy presentations. I learned this technique after many messy first slices ruined the appearance of otherwise perfect cakes.
This cake actually improves with time as the flavors meld. I prefer making it one day ahead of serving, which also relieves day-of entertaining stress. It keeps beautifully in the refrigerator for up to 3 days, though the fresh raspberries in the filling may soften slightly after the second day.
For make-ahead options, you can freeze the unfrosted cake layers for up to 1 month. Wrap each cooled layer individually in plastic wrap, then aluminum foil, and freeze flat. Thaw overnight in the refrigerator before unwrapping to prevent condensation from making the cake soggy. I wouldn’t recommend freezing the assembled cake, as the ganache texture can change slightly upon thawing.
If you have leftover cake (though this rarely happens in my house!), individual slices can be wrapped and refrigerated for quick desserts throughout the week. I find that a 10-second microwave zap revives refrigerated slices perfectly, just enough to take the chill off without melting the ganache.
For summer gatherings where the cake might sit out in warm weather, I stabilize the ganache with an additional ounce (28g) of chocolate to raise the melting point slightly, ensuring it maintains its shape longer at room temperature.
Conclusion
Creating this chocolate raspberry ganache cake has been a journey of perseverance and discovery in my kitchen. What began as an attempt to make something special for my egg-allergic daughter has evolved into a signature dessert that friends and family request by name. The combination of rich chocolate, bright raspberry, and silky ganache creates something truly greater than the sum of its parts.
Don’t be intimidated by the multiple components or techniques. Each step builds your baking confidence and creates a deeper understanding of how flavors and textures work together. I’ve shared every mistake I’ve made and every solution I’ve discovered so that your experience can be smoother than mine was when I started.
Remember that baking is both science and art. Follow the temperature guidelines precisely for the ganache, but feel free to adjust the raspberry intensity to suit your taste. Your kitchen will smell incredible, your loved ones will be impressed, and you’ll have mastered a dessert that looks and tastes like it came from a professional bakery.
As you slice into those beautiful layers with the hidden bursts of fresh raspberries, take a moment to appreciate what you’ve created. This cake celebrates not just chocolate and raspberry, but the joy that comes from making something with your own hands to share with others. That’s what makes it truly special in my Castleton kitchen, and I hope in yours as well.
Love this recipe? Follow us on Facebook and Pinterest and explore more creative ideas on our food blog!
Frequently Asked Questions
How to achieve a perfectly smooth chocolate raspberry ganache?
For perfectly smooth ganache, chop chocolate very finely, heat cream to just below boiling (90°C/194°F), and pour over chocolate. Let sit undisturbed for 5 minutes before stirring gently from the center outward. For the raspberry version, strain puree twice to remove all seeds and fiber. Temperature is crucial: apply ganache when it’s around 32-34°C (90-94°F) for optimal spreadability. Use an offset spatula in smooth, confident strokes, and work on a properly cooled cake to prevent melting.
Do raspberry and chocolate truly complement each other in a cake?
Absolutely! Raspberry and chocolate create a perfect flavor balance because the tart, bright acidity of raspberries cuts through the rich, deep sweetness of chocolate. This contrast awakens the palate and prevents the cake from becoming one-dimensional. The slight floral quality of raspberries also highlights the fruity notes naturally present in good chocolate. I’ve found that this pairing creates a more sophisticated and balanced dessert than chocolate alone.
What makes ganache different from a standard frosting?
Ganache is essentially an emulsion of chocolate and cream, while standard frosting typically contains butter, powdered sugar, and flavorings. Ganache has a richer, more intensely chocolate flavor and a silkier mouthfeel than buttercream. It sets firmer at cool temperatures but becomes luxuriously melty at room temperature. Ganache is also more versatile; by adjusting the chocolate-to-cream ratio, you can create anything from a pourable glaze to a firm truffle filling, whereas standard frostings maintain a similar consistency regardless of temperature.
What are common reasons for ganache not setting properly?
The most common reason for ganache not setting is incorrect chocolate-to-cream ratio. For a frosting consistency, use 2 parts chocolate to 1 part cream by weight. Using chocolate chips instead of baking chocolate can also cause problems, as chips contain stabilizers that affect melting. Introducing water (even a few drops) can prevent proper setting, so ensure all utensils are completely dry. Finally, inadequate cooling time or working in a very warm kitchen can make ganache appear runny when it simply needs more time to set.
Can I make chocolate raspberry ganache cake ahead of time?
Yes, this cake actually improves with a bit of time as flavors meld. You can make the complete cake 1-2 days ahead and refrigerate it covered loosely with a cake dome or tent of foil (avoid touching the surface). For longer planning, bake and completely cool the cake layers, wrap them individually in plastic wrap and foil, then freeze for up to one month. Thaw in the refrigerator overnight before assembling. The ganache can be made up to 3 days ahead and refrigerated; bring to spreading consistency by gently warming before using.
What type of chocolate is best for ganache?
Semi-sweet or bittersweet chocolate with 55-70% cocoa content makes the best ganache for this cake. Higher-quality chocolate with fewer additives will create the smoothest texture and richest flavor. Always use baking chocolate rather than chocolate chips, as chips contain stabilizers that can prevent proper melting and setting. Brands like Ghirardelli, Valrhona, or Callebaut work exceptionally well, but even Baker’s chocolate produces good results. The chocolate’s quality significantly impacts the final taste, so use the best you can reasonably afford.
Are there any dairy-free alternatives for this cake?
Yes, I’ve successfully made dairy-free versions of this entire cake. For the ganache, substitute full-fat coconut cream (the thick part from a can of coconut milk) for heavy cream in equal amounts. The resulting ganache is slightly softer but sets well when chilled. In the cake batter, use plant-based butter and plant-based milk with a teaspoon of lemon juice added to create a buttermilk effect. For an entirely vegan version, combine the egg replacement method I mentioned (yogurt plus additional baking powder) with these dairy alternatives. The result is remarkably similar to the traditional version.