No Egg Recipes – Delicious Cooking Without Eggs
Dump Cake Recipes: Simple Steps to Elevate This Easy Dessert
Unlock fail-proof dump cake recipes with Elsie's proven 7-step guide. Perfect for busy bakers, these desserts impress every time. Discover Elsie's trusted
The first time I attempted dump cake recipes, I nearly laughed at the simplicity. After years of meticulously measuring ingredients for traditional cakes, the idea of literally dumping everything in a pan seemed too good to be true. But that first bite of warm, bubbling fruit topped with a buttery crumb crust changed everything. Now, dump cakes are my go-to when I need a quick dessert that impresses without the fuss. I’ve learned that while the basic method is foolproof, small tweaks can transform this humble dessert into something truly special.
- Texture target: Crisp, golden top with perfectly jammy fruit layer beneath
- Reliable swap: Fresh citrus zest instead of extract for brighter flavor
- Make-ahead: Assemble dry ingredients in advance, add butter just before baking
Table of Contents
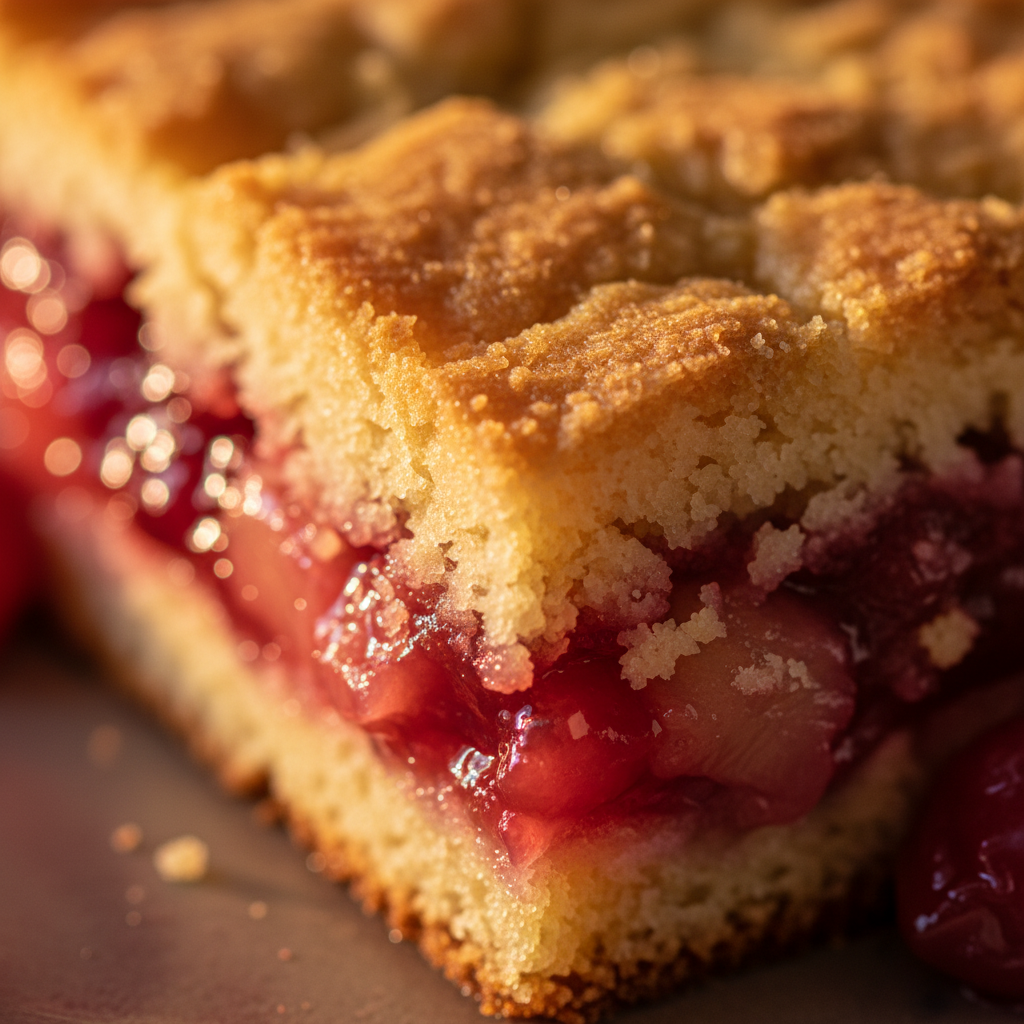
Cherry Pineapple Dump Cake
This incredibly easy cherry pineapple dump cake is the ultimate minimal-effort dessert, perfect for busy weeknights or unexpected guests. With just a few ingredients, you'll have a warm, bubbly fruit dessert topped with a golden, buttery cake crust.
PREP TIME
15 mins
15 mins
COOK TIME
40 mins
40 mins
TOTAL TIME
55 mins
55 mins
Servings: 12 servings
Course: Snack
Cuisine: American
Calories: 434
🥄 Ingredients
- 1 (21 ounce / 595 g) can cherry pie filling
- 1 (15 to 20 ounce / 425 to 570 g) can crushed pineapple
- 1 (15.25 ounce / 432 g) package yellow cake mix
- 1 cup (226 g) unsalted butter
👩🍳 Method
- Preheat your oven to 325ºF (160ºC). Lightly spray a 9×13-inch (23×33 cm) baking dish with nonstick cooking spray.
- Evenly spread the cherry pie filling across the bottom of the prepared baking dish.
- Pour the crushed pineapple evenly over the top of the cherry pie filling. Do not mix the layers.
- Sprinkle the dry yellow cake mix evenly over the pineapple layer, ensuring it covers the fruit completely.
- Melt 1/2 cup (113 g) of the butter and carefully pour it evenly over about half of the cake mix. This will help create some crispy spots.
- Cut the remaining 1/2 cup (113 g) of butter into small, thin pats and distribute them over the rest of the dry cake mix layer. Aim to cover as much surface as possible with butter.
- Bake in the preheated oven for approximately 40 minutes, or until the top is golden brown and the fruit filling is visibly bubbling around the edges. A toothpick inserted into a cake-like section should come out mostly clean.
- Remove from oven and let cool slightly before serving warm, perhaps with a scoop of vanilla ice cream or a dollop of whipped cream, if desired.
Notes: Large cans of pineapple typically range from 425 g to 570 g. Any size within this range will work perfectly. Always ensure the cake is golden brown and the filling is bubbling around the edges to confirm it's baked through. Store leftovers covered in the refrigerator for 3-4 days.
Why This Recipe Works for Busy Bakers
As someone juggling family life in our quiet Castleton village with running NoEggRecipes.com, I understand the value of efficiency. The beauty of these fruity baked creations lies in their forgiving nature. Unlike traditional cakes that demand precision, dump cake forges its own path with remarkable consistency. The moisture from the fruit bubbles up while baking, creating a self-saucing dessert that’s nearly impossible to mess up.
What truly makes these desserts stand out is the contrast between the gooey, jammy fruit base and the crisp, buttery topping. This textural interplay happens naturally during baking – no special techniques required. For busy parents like me, it’s a revelation to create something so delicious with just minutes of active time. When Molly first tried my peach blueberry version, her eyes lit up with that special joy that makes all the kitchen experiments worthwhile. To further enhance dessert flavors, consider experimenting with unique ingredients.
Ingredient Notes & Smart Substitutions
The magic of a great dump cake starts with thoughtful ingredients. While the classic combination uses canned pie filling and boxed cake mix, I’ve discovered some game-changing alternatives through years of experimentation.
For the fruit layer, quality matters tremendously. Premium canned fruits provide more consistent results than budget options, which often contain more syrup than fruit. When using fresh fruit instead, I toss it with a tablespoon of cornstarch and a few tablespoons of sugar to create that same jammy consistency. Frozen fruit works beautifully too – just thaw and drain excess liquid first. If you’re interested in more eggless options, check out this eggless cookie recipe for inspiration.
The cake mix component offers endless possibilities. While white and yellow cake mixes are traditional, I’ve had wonderful results with spice cake mix paired with apples, and chocolate cake mix with cherry filling. For a from-scratch approach, I combine flour, sugar, baking powder and a pinch of salt with complementary spices like cinnamon, nutmeg, or cardamom.
The butter component deserves special attention. Slicing it thinly rather than melting it creates those perfect pockets of buttery goodness throughout. For a dairy-free version that still delivers on richness, coconut oil works surprisingly well.
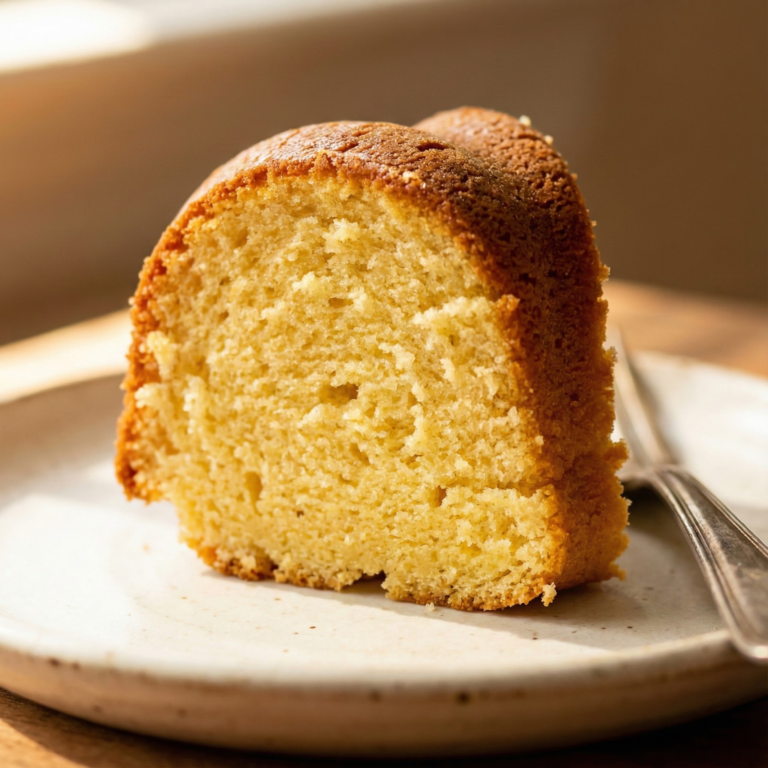
Essential Equipment for the Perfect Dump Cake
Despite the rustic nature of dump cake, having the right baking vessel makes a significant difference. My go-to is a 9×13-inch baking dish, preferably ceramic or glass. These materials distribute heat evenly and allow you to see the bubbly action happening along the sides – a visual cue that your cake is progressing nicely. If you’re looking for more baking tips, visit my bundt cake recipes for guidance.
While not strictly necessary, a microplane grater has revolutionized my dump cakes. Adding fresh citrus zest directly over the fruit layer brightens the entire dessert. I keep one handy specifically for this purpose.
A good quality butter knife or pastry cutter helps distribute butter evenly across the top. This simple tool prevents the dreaded dry patches that can occur when butter isn’t properly distributed.
For serving, a sturdy metal spatula with a thin edge slides cleanly under portions without disturbing the layers. Paired with shallow bowls rather than plates, this setup contains the juicy fruit layer perfectly. I learned this tip after a particularly memorable dessert disaster when Molly and I watched helplessly as river of hot blueberry filling ran across our white tablecloth!
Pro Tips & Troubleshooting Common Dump Cake Issues
After countless dump cakes (and occasional dump cake disasters), I’ve compiled solutions to the most common issues. First, if your cake consistently turns out soggy, try reducing the moisture in your fruit layer. For canned fillings, drain some of the liquid before adding to the pan. With fresh fruit, letting it macerate with sugar for 15 minutes then draining excess juice works wonders. For more on preventing soggy desserts, you can refer to this no-bake cheesecake recipe.
Dry spots on top usually indicate uneven butter distribution. I’ve found that grating cold butter rather than slicing it creates more uniform coverage. Alternatively, melting the butter and drizzling it methodically over every inch of the dry mix prevents those disappointing powdery patches.
Temperature matters more than you might think. Starting with a preheated oven ensures the bottom fruit layer bubbles properly while the top gets crisp. If you notice the top browning too quickly before the filling bubbles, simply cover loosely with foil for the remaining baking time.
One technique that elevates any dump cake is the mid-bake stir. About 20 minutes into baking, gently stir just the top layer to incorporate any dry spots. This creates a more cobbler-like consistency that many prefer to the traditional crust-like top.
Delicious Variations & Flavor Twists
The versatility of dump cakes makes them perfect for seasonal adaptations. My peach blueberry pecan combination has become legendary in our village’s summer gatherings. The sweetness of peaches balances perfectly with tart blueberries, while pecans add essential textural contrast. If you enjoy fruity desserts, you may want to explore my blueberry crumb bars as an alternative treat.
For fall, I create an apple cranberry version with warming spices. The tartness of cranberries cuts through the sweetness, creating a more balanced dessert. Adding a splash of bourbon to the fruit layer introduces complexity that adults appreciate.
Winter calls for a decadent chocolate cherry creation using devil’s food cake mix. The combination tastes indulgent yet remains wonderfully simple. A sprinkle of coarse salt on top before baking enhances the chocolate notes significantly.
Spring inspires a lemon berry variation using lemon cake mix and mixed berries. The bright citrus notes complement the berries perfectly. Adding a handful of white chocolate chips creates pockets of creamy sweetness throughout.
For something completely unexpected, try a savory-sweet variation with pineapple, a touch of chili powder, and a yellow cake mix. The sweet-heat combination is surprising and addictive. This Hawaiian-inspired version converts even the most skeptical dump cake critics.
Serving Suggestions & Storage Tips
Dump cakes reach their pinnacle when served warm, about 15-20 minutes after emerging from the oven. This timing allows the fruit to set slightly while maintaining that coveted warm, comforting quality. For the ultimate experience, add a scoop of quality vanilla ice cream that slowly melts into the warm cake, creating a delightful temperature and texture contrast.
For a lighter option, whipped cream complements fruit-forward variations beautifully. I prefer homemade whipped cream with just a touch of vanilla, but store-bought works in a pinch. For chocolate versions, a drizzle of caramel sauce takes the dessert to new heights. Learn more about serving options for desserts to elevate your treats.
Storage requires thoughtfulness to maintain quality. If you anticipate leftovers, cover the cooled cake with plastic wrap and refrigerate for up to three days. The cake will become more moist as it sits, which some actually prefer.
To reheat individual servings, microwave for 20-30 seconds until just warm. For larger portions, cover with foil and warm in a 300°F oven for about 15 minutes. If the top loses its crispness during storage, a few minutes under the broiler restores that desirable texture.
While freezing is possible, the texture suffers slightly upon thawing. If necessary, freeze for up to one month, thaw overnight in the refrigerator, then reheat as directed above.
Avoiding the Biggest Dump Cake Mistakes
After teaching numerous friends how to make dump cakes, I’ve noticed patterns in first-time mistakes. The most common error is improper layering. Remember that the order matters significantly: fruit on bottom, dry ingredients in the middle, butter on top. Reversing or mixing these layers results in uneven baking and texture problems.
Another frequent mistake is using cold fruit straight from the refrigerator. This forces the oven to work harder and often results in uneven baking. Allow refrigerated ingredients to come to room temperature before assembling your cake.
Impatience during baking leads to disappointment. Unlike conventional cakes, dump cakes need adequate time for the fruit to bubble and the top to form a proper crust. Look for visual cues: bubbling around the edges and a golden-brown surface indicate doneness.
Using the wrong pan size can sabotage results. Too small, and the cake overflows; too large, and layers become too thin to develop proper textures. Stick with a standard 9×13-inch baking dish for consistent results.
Finally, treating dump cake like traditional cake when serving leads to collapsed portions and messy presentations. Use a serving spoon rather than a cake server, and accept that this dessert’s rustic nature is part of its charm.
What Makes a Dump Cake So Simple?
The genius of dump cakes lies in their science-backed simplicity. These desserts rely on a fundamental baking principle: heat causes fruit to release moisture, which then combines with the dry ingredients above to create a self-assembling cake structure.
Unlike traditional cakes that require careful incorporation of ingredients to develop gluten properly, dump cakes bypass this step entirely. The weight of the butter and dry ingredients pressing down on bubbling fruit creates natural stratification – a technical term for the distinct layers that form during baking.
The cooking process creates three distinct textures: the jammy fruit base, a tender cake-like middle layer where fruit juice meets dry mix, and the crisp top crust where butter browns. This textural variety happens automatically without any special technique required from the baker.
What’s particularly fascinating is how forgiving dump cakes are to variations in ingredients. The proportions don’t need to be exact because the chemical reactions during baking naturally balance moisture and structure. This explains why they’re virtually foolproof compared to traditional baking methods that demand precision.
This inherent simplicity makes dump cakes perfect for introducing children to baking. Molly and I started making them together when she was just six years old, building her confidence in the kitchen through consistently successful results.
Elevating Your Dump Cake for a Tastier Treat
While the classic method produces reliable results, strategic upgrades transform ordinary dump cakes into memorable desserts. My most significant revelation came when I started toasting dry ingredients before adding them to the fruit. Just five minutes in a dry skillet intensifies flavors tremendously, especially with nuts and coconut.
Layering techniques make a substantial difference. Instead of mixing all fruit together, try creating distinct fruit sections for visual impact and flavor exploration. A recent dinner party featured a quadrant cake with cherry, blueberry, peach, and apple sections that prompted lively conversation about favorites.
Adding depth with complementary liquids elevates the fruit component significantly. A splash of bourbon with apples, amaretto with cherries, or limoncello with berries introduces complexity without complicating the process. For family-friendly versions, fruit juices achieve similar effects.
The top crust benefits from textural additions. Beyond nuts, try adding oats, crushed cookies, or granola for interest. My personal favorite is a streusel-inspired topping using a mixture of brown sugar, flour, and butter crumbles scattered over the traditional cake mix layer.
Finally, consider infused butters for the top layer. Compound butters with citrus zest, vanilla bean, or spices melt into the cake, distributing flavor throughout. This simple step transforms the entire profile with minimal additional effort.
Conclusion
My journey with dump cake recipes has taught me that simplicity and deliciousness aren’t mutually exclusive. What began as a skeptical experiment has become a cornerstone of my home cooking repertoire, especially when time is tight but the desire for something sweet and comforting remains strong.
The beauty of these versatile desserts lies in their adaptability to both ingredients and skill levels. Whether you’re a novice baker or a seasoned pro looking for a shortcut, dump cakes deliver consistent satisfaction while leaving plenty of room for creative expression.
As with all cooking, the key to truly exceptional results comes from quality ingredients and thoughtful preparation. Those few extra moments adding fresh citrus zest, toasting nuts, or selecting the perfect fruit combination yield disproportionate returns in flavor.
I encourage you to embrace both the convenience and potential of dump cakes. Start with the basic method, then gradually incorporate the enhancements that appeal to your palate. Before long, you’ll develop your own signature version that friends and family request by name. In our home, Molly now proudly creates her own variations, a testament to how these simple desserts can inspire confidence in the kitchen across generations.
Love this recipe? Follow us on Facebook and Pinterest and explore more creative ideas on our food blog!
Frequently Asked Questions
Why is my dump cake soggy?
Soggy dump cakes usually result from excess moisture in the fruit layer. If using canned fruit, drain some of the syrup before adding to the pan. For fresh fruit, toss with 1-2 tablespoons of cornstarch to absorb excess juice during baking. Also check that your oven temperature is accurate – too low a temperature prevents proper moisture evaporation during baking.
Can I use fresh fruit instead of canned pie filling in a dump cake?
Absolutely! Fresh fruit works beautifully in dump cakes with a few adjustments. Slice fruit into even pieces and toss with 2-4 tablespoons of sugar (depending on the fruit’s natural sweetness) and 1-2 tablespoons of cornstarch or flour to create the thickness that canned pie filling would provide. You may need to add about 1/4 cup of water or fruit juice for drier fruits like apples to create enough moisture.
What is the best way to store leftover dump cake?
Cover the cooled dump cake with plastic wrap or transfer to an airtight container and refrigerate for up to 3-4 days. For best results when serving, reheat individual portions in the microwave for 20-30 seconds until just warm, or place the whole cake (covered with foil) in a 300°F oven for about 15 minutes. While you can freeze dump cake for up to a month, the texture may change slightly upon thawing.
How can I prevent my dump cake from being too dry?
To prevent dryness, ensure you’re using enough butter on top – about 1/2 to 3/4 cup (1 to 1.5 sticks) sliced thinly and arranged to cover the entire surface. Another trick is to gently press the cake mix layer into the fruit slightly before adding butter. For extra insurance against dryness, drizzle 1/4 cup of fruit juice, water, or even melted butter over any visible dry spots about halfway through baking.
What ingredients are essential for a basic dump cake recipe?
A basic dump cake requires just three essential components: fruit filling (typically 2-3 cups of canned pie filling or prepared fresh fruit), dry cake mix (one standard box, about 15-16 ounces), and butter (1/2 to 3/4 cup, sliced or melted). Beyond these basics, additions like nuts, spices, extracts, or zest are optional but can significantly enhance flavor and texture.