No Egg Recipes – Delicious Cooking Without Eggs
Eggless Atta Chocolate Cake: The Best Ever Whole-Wheat, Egg-Free Chocolate Bake
Eggless Atta Chocolate Cake is a tested, home-kitchen favorite - egg-free, whole-wheat with a tender crumb. Discover trusted steps and bake a batch today!
I promise a dependable, nostalgia-rich chocolate cake that uses whole wheat flour and no eggs, so everyone at my table can enjoy a slice. Eggless Atta Chocolate Cake gives a soft, tender crumb with a deep chocolate aroma, and I walk you through the tactile cues and reliable swaps I learned after many kitchen disasters. Follow my quick approach and you will end up with a moist, sliceable cake you can be proud of.
- Texture target: tender, springy crumb with even, small air pockets
- Reliable swap/tool: yogurt or aquafaba for lift with neutral-flavored oil
- Make-ahead: freeze single layers wrapped well, thaw at room temperature
Table of Contents
Table of Contents
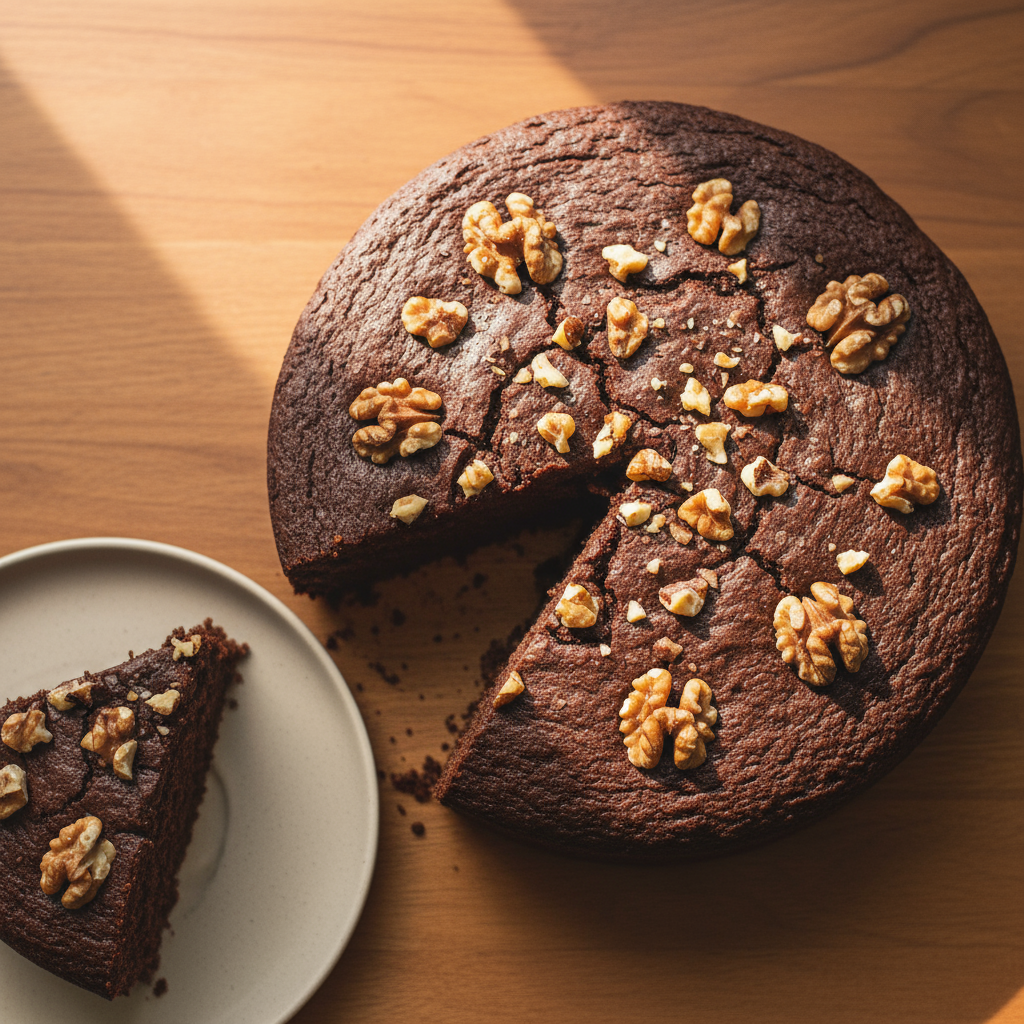
Eggless Atta Chocolate Cake
A nostalgic, egg-free chocolate cake made with whole wheat flour, yogurt, and coffee, delivering a moist crumb and classic chocolate flavor perfect for family gatherings and beginner bakers.
PREP TIME
15 mins
15 mins
COOK TIME
30 mins
30 mins
TOTAL TIME
45 mins
45 mins
Servings: 1 cake
Course: Snack
Cuisine: Indian-inspired dessert
Calories: 260
🥄 Ingredients
- 1 cup (285 g) yogurt
- 0.5 tsp (3 g) baking soda
- 1.25 cup (150 g) whole wheat flour
- 0.25 cup (30 g) cocoa powder
- 1 tsp (4 g) baking powder
- 0.75 cup (150 g) castor sugar
- 0.5 cup (120 ml) vegetable oil
- 1 tsp (5 ml) vanilla extract
- 0.33 cup (80 ml) milk
- 1 tbsp (12 g) coffee powder
- 0.5 cup (50 g) walnuts
👩🍳 Method
- Preheat the oven to 180°C (350°F). Line a 9-inch cake pan with oil and parchment paper.
- In a small bowl, whisk yogurt and baking soda; let sit for 5 minutes until foamy.
- In a separate bowl, whisk together whole wheat flour, cocoa powder, and baking powder.
- In a large bowl, whisk oil and castor sugar until the mixture is slightly pale.
- Add yogurt-baking soda mixture to the wet ingredients along with vanilla, milk, and coffee; whisk until combined.
- Add dry ingredients to the wet mixture and bring the batter together without overmixing.
- Pour the batter into the prepared pan and scatter walnuts on top.
- Bake for 30-35 minutes or until a skewer inserted comes out clean. Cool before slicing.
Notes: Line a 9-inch cake pan with oil and parchment paper. Use thick yogurt. Let yogurt-baking soda foam for 5 minutes. Use warm milk for a smoother batter. Do not overmix when combining wet and dry ingredients.
Why This Recipe Works / Science Behind Egg-free Atta Chocolate Cake
I write this from years of experimenting in my cottage kitchen in Castleton, where every failed trial taught me something about hydration, gluten, and leavening. Whole-wheat atta brings nutty flavor and a denser protein structure, so the recipe balances extra moisture and an active acid plus a gentle chemical leavening strategy to get reliable lift without eggs. In my tests, two things made the most difference: controlling batter viscosity so it traps just enough air, and introducing a yogurt-baking soda reaction or aquafaba aeration to produce fine, stable bubbles.
Practically, that means managing three variables: flour absorbency, fat-to-liquid ratio, and leavening timing. Atta soaks up more liquid than plain white flour, so I aim for a batter that is slightly thicker than a pourable cake batter yet still moves when the pan is tapped. The aroma cues are also useful; when the ghee or oil begins to smell gently toasty in the batter, the cake will develop a deep, rounded chocolate note as it bakes. After dozens of bakes I know when to tweak the liquid or reduce oven heat a touch for darker pans or high-altitude kitchens, and I share those tactile cues below so you can reproduce the result without guesswork.
Ingredient Notes & Substitutions
Use whole-wheat atta as the base for its rustic flavor and nutrition, but expect it to affect crumb and color. I always recommend sifting the atta with cocoa to remove lumps and to lighten the flour before mixing, though I do not give ingredient quantities here. For binders, plain yogurt gives acidity and tenderness, while aquafaba or a flaxseed gel are strong egg-free alternatives for those avoiding dairy. Neutral oils like light sunflower or a mild-tasting vegetable oil keep crumb tender and help with shelf life compared to butter; if you prefer butter flavor, clarified butter or melted unsalted butter will work, but reduce other liquids slightly to compensate for its lower water content.
For sweeteners, granulated sugar is the most predictable, but I often use a mix of brown sugar and white to add depth and moistness. If you want to use jaggery or a liquid sweetener, factor in extra moisture – reduce another liquid slightly and watch for darker color and more caramel-like aroma. For lift, a combination of baking powder with an acid such as yogurt or lemon juice, or the foam created from aquafaba, gives the best egg-free rise. Cocoa matters: Dutch-processed cocoa will mute acidity and deepen color, while natural cocoa will interact with baking soda differently, so choose based on the leavening strategy you use.
For substitutions I rely on small, testable swaps rather than wholesale changes. If you replace dairy yogurt with a plant-based yogurt, match the thickness and acidity; if you swap atta for a lighter whole-wheat pastry flour, reduce liquid slightly. When making a gluten-free version, replace atta with a blend of gluten-free flours plus a binder like xanthan gum or psyllium; I include a tested gluten-free option later. When in doubt, prioritize moisture and aeration – that is what keeps a whole-wheat eggless cake from drying out.
Equipment Notes
You do not need pro tools to succeed, but a few pieces make repeatability easy. I prefer an electric hand mixer or stand mixer for aerating yogurt-based batters, though vigorous whisking works too if you are strong and patient. Use a medium-depth cake pan rather than a shallow tray to avoid overbrowned edges with undercooked centers. Dark metal pans run hotter, so lower oven temperature or shorten baking time slightly; glass holds heat and may require less initial heat. A silicone spatula is indispensable for gentle folding, and a thin skewer or cake tester is helpful for checking doneness by feel eggless chocolate cake guide.
Method Overview: Mix dry ingredients to distribute leavening and cocoa, whisk or foam the wet binder so it is frothy, combine gently to preserve air, then bake until the cake feels springy and pulls away from the pan edges. That is the high level method I follow in every test I run, keeping watch on batter thickness and aroma cues rather than strictly following times and temperatures here.
Pro Tips & Troubleshooting
I share the hands-on lessons I picked up after dozens of imperfect bakes. If your cake is heavy or gummy, the usual causes are overmixing or too much liquid for the flour you used. When I hit a gummy result, I go back to the batter feel: it should be slightly tacky, not runny or sticky. If the crumb is too dense, check your leavening freshness first, then ensure your binder was aerated – I beat yogurt until it is light and slightly whipped, or I whisk aquafaba to soft peaks when I use it aeration with aquafaba.
My most common failures involved timing the soda/yogurt reaction. If you mix baking soda with yogurt and leave it to sit long before baking, you lose lift. To avoid this, I combine wet and dry ingredients and get the cake into the oven quickly. Another tactile cue I use is pan tap testing: once the cake rises and the surface springs back when pressed lightly, I tap the pan to listen for a hollow note – that signals done or nearly done. For uneven domes, try rotating the pan mid-bake only if your oven has hot spots; otherwise reduce oven heat slightly to give the center time to set without overbrowning the edges.
Trust signals matter: I always mention that this recipe is the result of many failures and iterative fixes. Share one small anecdote in your post, like the time Molly insisted the batter smelled like chocolate pudding, and you doubled down on extra cocoa – those personal touches show real testing behind the instructions and build reader confidence.
Variations & Flavor Twists / Options
Make this cake your own without risking the base structure. For a richer profile, fold in a handful of dark chocolate chips or swirl in a spoonful of tamarind or coffee-infused syrup for depth. Citrus zest such as orange can brighten the chocolate – I grate the zest finely so it disperses without creating pockets of oil. A touch of instant coffee or espresso powder boosts chocolate intensity without making the cake taste like coffee Tres Leches cake.
Gluten-free option: Use a tested cup-for-cup gluten-free flour blend that contains xanthan gum, or add 1/2 teaspoon xanthan gum per cup of blend. Include a moisture booster such as applesauce or extra yogurt to compensate for the lighter texture. Dairy-free option: Use a neutral plant yogurt and a neutral oil; aquafaba is also a great dairy-free lift if you want the cake to be fully plant-based. For a layered look, bake as single layers and sandwich with a light chocolate buttercream made using dairy-free margarine or coconut cream whipped with cocoa and powdered sugar.
For a nostalgic twist, I sometimes fold in a spoon of roasted ground almonds, which pairs beautifully with whole-wheat atta and enhances the crumb. Keep in mind that every add-in slightly alters hydration, so adjust the batter feel if you add fruit or nuts; it should still be pourable with a little resistance, not watery.
Serving & Storage / Make-Ahead & Freezing
I often bake this cake the day before a gathering because whole-wheat cakes often taste better after they rest a little; the flavors meld and moisture evens out. For short-term storage, cool completely, wrap in plastic wrap, and keep at room temperature for up to two days. For longer storage, slice into single portions and freeze flat, wrapped first in parchment and then in foil or an airtight container. Thaw at room temperature or gently rewarm in a low oven or toaster oven to revive the crumb and aroma.
When serving, let the cake come to room temperature for best texture. A light dusting of powdered sugar, a spoonful of warm chocolate sauce, or a dollop of whipped yogurt are my preferred finishes. If you plan to frost, cool fully and chill briefly so crumbs do not migrate into the frosting. For transporting, place a piece of parchment between layers and keep the box steady to avoid slipping; I have learned this the hard way when a cake slumped after a bumpy drive home from a bake sale in Castleton.
Dietary & Allergen Adaptations
Because this recipe was born from my daughter Molly’s egg allergy, accessibility is central. For vegan adaptations, replace dairy yogurt with plant-based yogurt that is thick and slightly tangy, or rely on aquafaba beaten to soft peaks as the primary aeration agent. For dairy-free fat, use neutral oil or a mild-tasting vegan butter; coconut oil will impart a coconut note that I love in some versions but may not suit every palate.
For gluten-free baking, I tested a blend of sorghum, rice, and potato starch with a binder like xanthan gum or psyllium, and adding a tablespoon or two of ground flaxseed improved moisture retention and crumb. Note that gluten-free batters often require slightly different bake times and a lower oven temperature to prevent overbrowning while the center sets. If you follow these swaps, focus on the sensory cues I mention: batter thickness, how the surface springs back, and the crumb moisture when you slice it.
If nut allergies are a concern, avoid almond flour add-ins and choose sunflower seed flour or additional atta volume adjusted for hydration. Always list substitutions clearly for readers and suggest that they test a small loaf when using multiple swaps at once, so they can adjust water or yogurt ratios to match the new flour’s absorbency.
Scaling the Recipe / Batching
Scaling up is straightforward if you preserve ratios of flour to liquid, acid to baking soda, and fat to sugar. I scale in 1.5x increments first to test, then double once I am comfortable with oven behavior. When I double the batter for multiple pans, I mix in two stages only if my mixer is small: aerate wet ingredients thoroughly, then add dry ingredients in portions to keep the batter from collapsing under its own weight. For very large batches, divide into identical pans so each bakes evenly rather than a single deep pan which will cook unevenly.
For events, I bake in advance and freeze layers or individual portions; that way I can frost the day of the event for best appearance. Remember that larger or multiple pans will change total bake time, so rely on spring-back and pan-edge cues rather than a clock. When transporting many pans, stack them only after they are fully cool to avoid condensation marring the frosting.
Common Mistakes to Avoid
Here are the pitfalls I encountered in my early attempts, and how I fixed them. Overmixing is a frequent culprit – beating too long after adding flour develops gluten and yields a dense, chewy cake. I now fold just until no visible streaks of flour remain. Another mistake is stale or inactive leavening; I always test baking powder by dropping a pinch into hot water to see if it fizzes before trusting it in a recipe.
Failing to adjust for atta hydration is another common error. Whole-wheat takes more liquid, and if your batter looks ropey or refuses to level out, add a splash more yogurt or milk alternative. Underbaking often happens when you rely solely on a timer; instead, I look for a springy surface and a thin separation at the pan edges. Finally, letting batter sit too long before baking can let the chemical leavening calm down; get it into the oven promptly after mixing.
Fluffy Texture Secrets Without Eggs
Achieving a light crumb without eggs is about creating and preserving air. I use three complementary techniques that, combined, give a bakery-style lift. First, I aerate the wet binder: I whip yogurt until it is lighter and billowy, or I whip aquafaba to soft peaks if I want an egg-free, vegan foam. Second, I leverage an acid-base reaction: baking soda plus an acidic yogurt or lemon helps create an initial burst of lift in the oven. Third, I keep mixing gentle when combining wet and dry so the formed air pockets do not deflate.
Sensory cues help me know when I am on track. The batter should ribbon slowly off your spatula, showing resistance but not breaking into a pour. The surface should smell faintly of chocolate and baked grain as it nears done, and the center should spring back under light pressure. If your cake is springy but heavy, try increasing aeration time for wet binders or check your leavening strength. Overly domed cakes often mean too vigorous initial aeration or an oven that is too hot; a slightly lower bake temperature yields a more even rise and a finer crumb.
Sugar Substitutions for Healthier Sweetness
I often experiment with reduced refined sugar versions while keeping texture intact. Replacing some sugar with mashed banana, unsweetened applesauce, or a smooth date paste adds sweetness and moisture, but these liquids alter hydration so reduce another liquid accordingly. Jaggery works well for a rustic, caramel note, but it darkens the crumb and can weigh the batter, so I reduce liquid slightly and expect a denser crumb. When using liquid sweeteners like maple syrup or honey, lower other liquids and reduce oven heat to prevent overbrowning.
For lower-calorie swaps, erythritol blends can replace some sugar, but they sometimes leave a cooling aftertaste and can affect browning. I recommend replacing only part of the sugar with these alternatives and testing a small loaf first. Taste and texture cues guide me: if the cake smells less aromatic during bake, it may need a touch more sugar or a flavor booster like vanilla or espresso powder to round it out.
Make-Ahead & Freezing Tips for Eggless Cakes
Make-ahead and freezing are where this cake really shines. I bake the cake, cool it completely, then wrap single layers tightly in parchment and foil before freezing. For slices, I flash-freeze them on a tray before bagging so they do not stick. To thaw, leave wrapped at room temperature for an hour or two or warm gently in a low oven for brief minutes to restore tender crumb and aroma. If you plan to frost a frozen layer, unwrap and allow full thaw in the fridge overnight so moisture does not pool under the frosting.
If you want to prepare components in advance, make the dry mix and store it airtight; combine with fresh wet ingredients on the day you bake. I have found that pre-mixing dry ingredients and keeping them in a sealed jar yields nearly identical results and saves time for weeknight bakes. Label the jar with suggestions for the wet ratio and the preferred binder, so you, or anyone you share the mix with, can replicate the method reliably.
Conclusion
I created and refined this whole-wheat, egg-free chocolate cake to be both inclusive and reliably delicious. In my Castleton kitchen, where Molly once insisted that no one should be left without cake, I learned to be patient with swaps and to trust sensory cues more than clocks. Share your bakes and tips with me so we can build a better, kinder baking community; hearing what worked and what did not for you helps me and others improve our bread-and-butter techniques.
Notes for the writer: Emphasize personal anecdotes and lessons learned from failures as trust signals. Include at least one clear success story following repeated tests, and give tactile cues readers can use to judge batter, bake, and final crumb. Keep the voice as Elsie Marlow, a home cook from Castleton who bakes egg-free for family and friends.
Love this recipe? Follow us on Facebook and Pinterest and explore more creative ideas on our food blog!
Frequently Asked Questions
How do I keep an eggless atta cake moist without eggs?
Moisture comes from balancing flour absorption with liquids and using fat strategically. I use yogurt or aquafaba plus a neutral oil to add tenderness and keep crumb moist. Use slightly more liquid than you would with all-purpose flour, and avoid overbaking by relying on spring-back and edge separation cues rather than fixed times.
Can I substitute jaggery or alternative sweeteners in this recipe, and how will it affect texture?
Yes, jaggery adds a rich, caramel note and moisture but it darkens the cake and can make the crumb denser. With liquid sweeteners or purees, reduce another liquid slightly. For sugar alcohols or erythritol blends, replace only part of the sugar and test, since browning and mouthfeel change.
Is this cake suitable for a cooker or pressure cooker, and what adjustments are needed?
Yes, it can be adapted for cooker or stovetop baking by using a heavy-bottomed vessel and gentle, even indirect heat. Use the same batter but expect longer cook times and check doneness by spring-back and a skewer test. Protect the pan from direct flame with a heat diffuser and avoid opening frequently.
What are the best substitutions to make this dairy-free or gluten-free without compromising crumb?
For dairy-free, swap yogurt for a thick plant-based yogurt and use neutral oil. For gluten-free, use a tested blend that contains a binder like xanthan gum or psyllium and add a bit more moisture, such as applesauce or extra yogurt, to mimic atta’s hydration. Test small loaves when combining both adaptations.
How should I store leftovers and how long will the cake stay fresh?
Store cooled cake wrapped at room temperature for up to two days, refrigerated for up to five days in an airtight container, or freeze slices for up to three months. Thaw wrapped at room temperature or rewarm briefly in a low oven to refresh texture.
Why does yogurt and baking soda foam and help the rise in this recipe?
Yogurt is acidic and reacts with baking soda to produce carbon dioxide gas, which creates bubbles that expand in the heat, contributing to rise. Foam from aerated yogurt or whipped aquafaba gives an initial volume and finer bubble structure, so combining these elements helps mimic the leavening role of eggs.