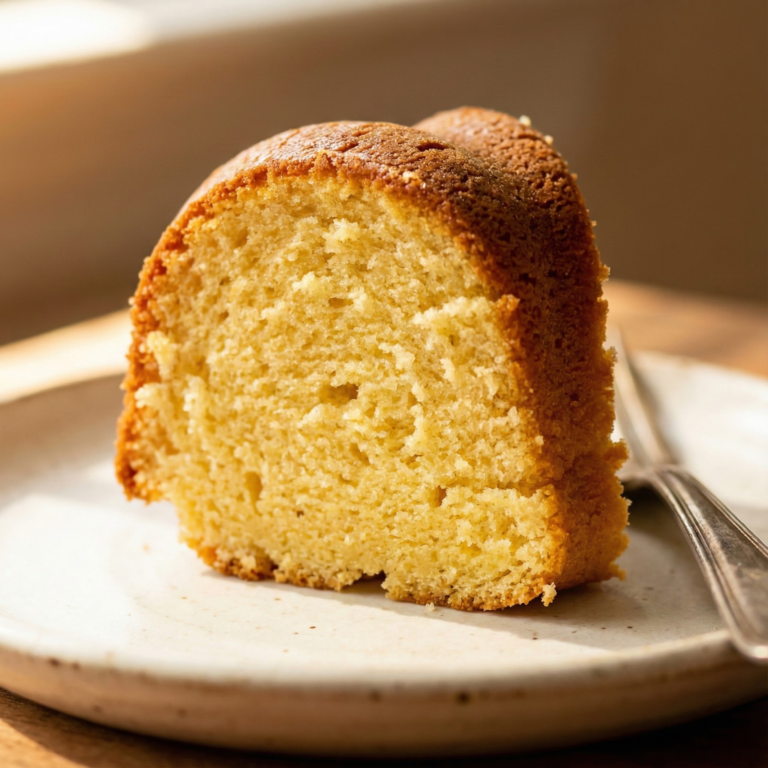
No Egg Recipes – Delicious Cooking Without Eggs
The Ultimate 5-Minute Mug Cake Microwave Guide
Unlock Elsie's proven method for fluffy, moist mug cakes in minutes. Perfect your mug cake microwave technique with 5 essential tips from years of baking. Get
After countless late-night chocolate cravings, I’ve perfected the mug cake microwave technique that delivers bakery-quality results in minutes. My journey started with a gummy disaster that left my daughter Molly giggling, but now we’ve cracked the code to fluffy, moist cake that satisfies sweet tooth emergencies without heating the entire oven. The secret? It’s all in the ingredient balance, mug selection, and precise timing that I’ve tested across different wattage settings.
- Texture target: Moist center with a light, springy crumb that doesn’t sink after cooling
- Reliable tool: Ceramic wide-mouthed mugs provide even heating and prevent overflow disasters
- Make-ahead option: Prepare dry ingredients in batches for 30-second mix-and-cook convenience
Table of Contents
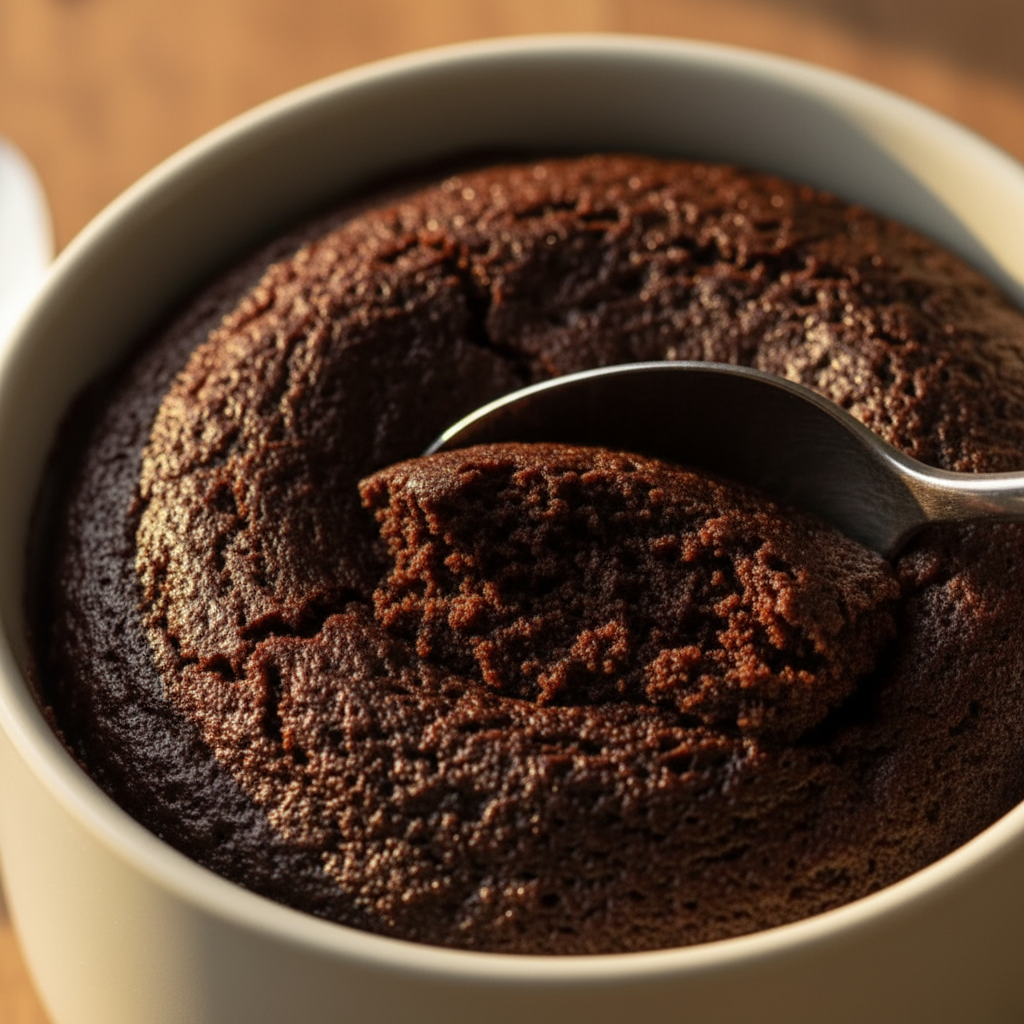
Easy Microwave Chocolate Mug Cake
A quick, satisfying single-serving chocolate cake made in minutes in the microwave, perfect for satisfying sudden dessert cravings with minimal effort.
PREP TIME
5 mins
5 mins
COOK TIME
2 mins
2 mins
TOTAL TIME
7 mins
7 mins
Servings: 1 serving
Course: Snack
Cuisine: American
Calories: 603
🥄 Ingredients
- 1/4 cup (32 g) all-purpose flour
- 1/4 cup (50 g) white sugar
- 2 tablespoons (10 g) unsweetened cocoa powder
- 1/8 teaspoon (0.5 g) baking soda
- 1/8 teaspoon (0.75 g) salt
- 3 tablespoons (45 ml) milk
- 2 tablespoons (30 ml) canola oil
- 1 tablespoon (15 ml) water
- 1/4 teaspoon (1.25 ml) vanilla extract
👩🍳 Method
- Gather all ingredients to ensure a smooth and quick preparation process.
- In a large microwave-safe mug (at least 2-cup capacity), combine the 1/4 cup (32 g) all-purpose flour, 1/4 cup (50 g) white sugar, 2 tablespoons (10 g) unsweetened cocoa powder, 1/8 teaspoon (0.5 g) baking soda, and 1/8 teaspoon (0.75 g) salt. Stir these dry ingredients together thoroughly with a fork until well combined.
- To the dry mixture, add the 3 tablespoons (45 ml) milk, 2 tablespoons (30 ml) canola oil, 1 tablespoon (15 ml) water, and 1/4 teaspoon (1.25 ml) vanilla extract. Stir everything together until the batter is smooth and no dry lumps remain. Scrape down the sides and bottom of the mug to ensure all ingredients are incorporated.
- Cook the mug cake in the microwave. Start with 1 minute and 45 seconds on high power. Check for doneness – the cake should look set in the middle. If it still appears very wet, microwave for additional 15-second intervals until done. Be careful not to overcook, as this can lead to a dry cake.
- Carefully remove the hot mug from the microwave. Allow it to cool for a minute or two before eating. Enjoy your warm, fudgy microwave chocolate mug cake directly from the mug!
Notes: For a lighter version, consider using 1.5 tablespoons (22.5 ml) of plain unsweetened applesauce instead of canola oil, and 3 tablespoons plus 1 teaspoon (50 ml) of water instead of milk. The cake is done when it looks set in the middle but still slightly moist. Avoid overcooking to prevent a dry or rubbery texture. Enjoy immediately for the best experience.
Why This Mug Cake Works Every Time
The science behind a successful microwave cake isn’t complicated, but it took me 15 failed attempts before understanding why some recipes collapse while others shine. The breakthrough came when I discovered the perfect ratio of moisture to dry ingredients. Too much liquid creates a soggy center, while too little results in a dry, rubbery texture.
What makes this particular approach foolproof is the balance of leavening agents. I use both baking powder and a touch of baking soda to create a rapid rise that sets before the cake has a chance to fall. The microwave’s short cooking time means we need faster-acting leaveners than traditional oven baking.
Another key element is the strategic pausing during cooking. By stopping the microwave halfway through and allowing the partially-cooked batter to rest for 10 seconds, I prevent overheating in any one spot, which leads to more even cooking. This technique transformed my mug cakes from inconsistent experiments to reliable treats.
When Molly first tasted the perfected version, her eyes widened with that look that tells me I’ve hit culinary gold. It’s that moment I chase in all my recipes, and this microwave cake delivers it consistently with minimal effort. For more baking tips, check out the eggless Nutella cake guide.
Ingredient Notes & Smart Substitutions
The beauty of microwave mug cakes lies in their flexibility. I’ve tested countless combinations in our little Castleton kitchen, and I’ve found some fascinating insights about how each ingredient functions in this unique cooking method.
For the flour component, all-purpose works wonderfully, but when I’m looking for an extra fluffy texture, I substitute cake flour. For those needing gluten-free options, a one-to-one gluten-free flour blend performs surprisingly well in microwave cakes, sometimes even creating a more tender crumb than wheat flour.
The sweetener you choose significantly impacts both flavor and texture. Regular granulated sugar creates a classic cake texture, while brown sugar adds moisture and a hint of caramel flavor. I’ve found that liquid sweeteners like honey or maple syrup make the cake denser but add wonderful depth of flavor. Just reduce other liquids slightly to compensate.
When it comes to the chocolate element, cocoa powder provides reliable results, but the quality matters tremendously. Dutch-processed cocoa creates a smoother, less acidic flavor profile compared to natural cocoa powder. For an extra indulgent treat, I fold in chocolate chips or chunks that create molten pockets throughout the cake.
For the essential moisture component, milk is the standard, but almond milk, oat milk, or even coffee can be substituted for unique flavor notes. Using coffee instead of milk intensifies the chocolate flavor without making it taste like coffee, a trick I discovered after several late-night experiments. For more substitutions, visit the flax egg recipe guide.
Essential Equipment for Mug Cake Success
The humble mug might seem like a simple vessel, but after countless overflows and uneven bakes, I’ve learned it’s perhaps the most crucial piece of equipment for microwave cake success. In my Castleton kitchen, I’ve tested dozens of containers and found that wide, straight-sided ceramic mugs yield the best results. They distribute heat more evenly than thin porcelain and provide adequate space for the cake to rise without spilling over.
Size matters significantly. A 12-16 oz mug (350-450ml) gives the perfect amount of headroom for the rising batter. Anything smaller leads to dramatic overflow situations, which Molly finds hilarious but requires considerable cleanup. Taller, narrower mugs often result in cakes that are overcooked on the edges and undercooked in the center.
Your microwave itself plays a crucial role in the outcome. I’ve made these cakes on three different microwaves over the years, ranging from 700 to 1200 watts. Higher wattage machines require shorter cooking times, while lower wattage ones need slightly longer. If your microwave doesn’t have a turntable, consider rotating the mug halfway through cooking for more even results.
For mixing, a small whisk helps incorporate air into the batter, though a fork works perfectly well too. I keep a dedicated small silicone spatula for scraping down the sides of the mug, ensuring all ingredients are properly mixed. This simple step prevents dry pockets of flour in the finished cake.
Measuring tools don’t need to be fancy, but accuracy helps with consistency. I use standard measuring spoons rather than eyeballing ingredients, especially for leavening agents which can make or break the texture. When I’m feeling particularly precise, I use my small kitchen scale for flour measurements, but this isn’t strictly necessary for everyday mug cake success.
Pro Tips for a Perfect Microwave Mug Cake
After years of experimentation in my Peak District kitchen, I’ve collected several game-changing techniques that elevate microwave mug cakes from emergency sweets to genuinely delicious desserts.
First, room temperature ingredients make a noticeable difference. Cold milk and eggs don’t incorporate as smoothly, often leading to a tougher texture. I set these items out while gathering other ingredients, which gives them just enough time to take the chill off.
The mixing method matters more than you might think. I start by thoroughly combining dry ingredients in the mug first, creating a well in the center before adding wet ingredients. This prevents flour pockets and ensures even distribution of leavening agents. Then I mix just until combined, about 20-30 strokes with a fork. Over-mixing activates gluten and leads to rubbery cakes, even in the microwave.
Strategic layering can create delightful surprises. After mixing the basic batter, I sometimes add a spoonful of jam, peanut butter, or chocolate spread pushed slightly into the center. This creates a molten middle effect that transforms a simple cake into something special.
The microwave power level is my secret weapon. Instead of cooking on full power the entire time, I start with 30 seconds at 100% power, then switch to 70% power for the remaining time. This gentler approach prevents the dreaded rubber-tire texture that plagues many microwave desserts.
Perhaps most crucial is the resting period. Once the cake is cooked, I let it stand untouched for 2 minutes. The residual heat completes the cooking process without overdoing it, and the texture sets properly. Molly always wants to dig in immediately, but this short wait improves the cake dramatically.
Creative Variations & Flavor Boosts
The beauty of microwave mug cakes lies in their incredible versatility. Once you master the basic formula, a world of flavor possibilities opens up, ready to match whatever cravings strike. In our Castleton kitchen, Molly and I have developed some favorite variations that transform this quick treat into something truly special.
For chocolate lovers, try adding a tablespoon of espresso powder to the dry ingredients. This coffee note doesn’t make the cake taste like coffee, but rather intensifies the chocolate flavor in a remarkable way. Another chocolate enhancement comes from adding a mixture of chocolate chips, some stirred into the batter and others sprinkled on top for textural contrast.
Fruit additions bring freshness and natural sweetness. Fresh berries folded gently into the batter just before cooking add bursts of flavor. Raspberries are particularly delightful with chocolate, while blueberries pair wonderfully with vanilla-based batters. For a tropical twist, add a tablespoon of well-drained crushed pineapple and a pinch of coconut.
Spice infusions can completely transform the character of your mug cake. A quarter teaspoon of cinnamon creates a Mexican chocolate profile, while a pinch of cardamom gives an exotic, sophisticated note. During autumn, I love adding pumpkin pie spice and replacing some of the liquid with pumpkin puree for a seasonal treat.
Texture enhancements make each bite more interesting. Try folding in chopped nuts, coconut flakes, or even crushed cookies just before cooking. For special occasions, I hide a square of good chocolate or a chocolate truffle in the center of the batter for a molten middle effect that delights guests.
For adults, consider adding flavor extracts beyond the standard vanilla. Almond extract pairs beautifully with cherry additions, while mint extract with chocolate creates a refreshing after-dinner dessert. Just remember that extracts are potent in the microwave, so use about half what you would in conventional baking.
When Molly has friends over, we set up a mug cake bar with various mix-ins and toppings, allowing everyone to customize their own creation. It’s a fun, interactive dessert experience that turns a simple microwave treat into a memorable activity.
Serving Suggestions & Storage Tips
The beauty of microwave mug cakes is their immediacy, typically enjoyed straight from the mug while still warm. However, with a few thoughtful additions and presentation techniques, you can transform this humble dessert into something truly special.
For everyday indulgence, a simple dusting of powdered sugar adds visual appeal and a hint of additional sweetness. A small scoop of vanilla ice cream placed on the warm cake creates that magical hot-and-cold contrast as it melts into the cake’s surface. When berries are in season, a few fresh raspberries or strawberries brighten both the flavor and appearance.
When serving to guests, consider transferring the cake to a proper dessert plate. To do this successfully, run a butter knife around the edge of the mug, then gently invert onto the plate. A drizzle of warm chocolate sauce, caramel, or fruit coulis creates a restaurant-worthy presentation. For dinner parties, I’ve served these with a small pitcher of warm custard on the side, much to everyone’s delight.
Though mug cakes are best enjoyed immediately, there are occasions when you might need to prepare them in advance. If you find yourself with leftover cake (a rare occurrence in our home!), cover it tightly with plastic wrap and refrigerate for up to 48 hours. To refresh it, sprinkle with a few drops of water and microwave for 10-15 seconds, which restores much of the original texture.
For busy weeknights, I often prepare several mugs with the dry ingredients premixed and covered with plastic wrap. A label indicating the required wet ingredients makes it possible for Molly to safely prepare her own dessert with minimal supervision, adding just the liquids before microwaving.
If you’re planning to serve several mug cakes for a gathering, you can prepare the batter in advance and refrigerate it for up to 2 hours. The texture may change slightly, but a few additional seconds in the microwave compensates for the chilled starting temperature. Just remember to leave adequate headspace in the mugs for rising.
As for accompaniments, consider serving these cakes with a hot beverage that complements the flavors. A rich hot chocolate pairs wonderfully with vanilla-based cakes, while coffee or tea creates a lovely contrast with chocolate versions. For festive ideas, browse our Christmas cake decoration tips.
Avoiding Common Mug Cake Mishaps
Through years of microwave cake experimentation (and plenty of memorable failures), I’ve encountered nearly every possible mug cake disaster. Let me share the most common pitfalls and how to avoid them, so your sweet treat turns out perfectly every time.
Overflow incidents are perhaps the most dramatic mishap. The first time I made a mug cake for Molly, it erupted like a volcano, creating a sticky mess throughout our microwave. The solution is simple: never fill your mug more than halfway with batter. The cake will rise significantly during cooking, and needs adequate space to expand. If your recipe seems too large for your mug, divide it between two containers.
Rubbery texture ranks as the most common complaint with microwave cakes. This usually happens from overcooking or using too much flour. I’ve learned to slightly undercook the cake, removing it when the center still looks slightly moist. It will continue cooking from residual heat while standing. If you’re unsure, start with 10 seconds less than the recipe suggests, as you can always add more time if needed.
Dry, crumbly cakes typically result from too little fat or moisture in the recipe. Adding an extra teaspoon of oil or milk can make a significant difference. Another trick I’ve discovered is adding a small piece of chocolate or a teaspoon of jam to the center of the batter, which melts during cooking and helps maintain moisture throughout.
Uneven cooking occurs particularly in higher-wattage microwaves. Some parts of the cake might be perfectly cooked while others remain raw or become overcooked. My solution is to cook at 70-80% power for a slightly longer time, which allows more even heat distribution. Additionally, stopping halfway through to rotate the mug helps if your microwave doesn’t have a turntable.
Dense, gummy centers often happen when there’s too much liquid in the batter or inadequate leavening. Make sure your baking powder is fresh, as it loses potency over time. I also find that thorough mixing of dry ingredients before adding wet components ensures the leavening agents are well distributed.
Lastly, bland flavor can make even a perfectly textured cake disappointing. Don’t skimp on the vanilla extract or other flavorings, and remember that a pinch of salt enhances sweetness and depth, even in desserts. After too many forgettable mug cakes, I now add a bit more vanilla and salt than most recipes suggest, with consistently better results.
Is Making a Mug Cake in the Microwave Safe?
When I first started experimenting with microwave mug cakes, my mother-in-law expressed concern about microwave cooking safety, particularly for baked goods. This led me to thoroughly research microwave cooking safety, and I’m happy to share what I’ve learned to put your mind at ease.
First and foremost, cooking food in a microwave is fundamentally safe when done properly. Modern microwaves use electromagnetic radiation at a specific frequency that excites water molecules in food, creating heat through molecular friction. This radiation is non-ionizing, meaning it doesn’t change the chemical structure of food in harmful ways or make it radioactive.
For mug cakes specifically, the main safety considerations involve the container and the cooking process. Always use microwave-safe mugs or containers, typically labeled as such on the bottom. Ceramic, glass (like Pyrex), and microwave-safe plastic are all appropriate choices. Avoid containers with metallic paint or trim, which can cause sparking. I learned this lesson the hard way with a decorative mug that created an alarming light show in our microwave!
Regarding the ingredients, all standard cake components cook safely in the microwave. However, raw eggs in mug cake recipes do need to reach a safe temperature to eliminate potential pathogens. Fortunately, the high heat achieved during microwave cooking easily meets food safety requirements when the cake is properly cooked through.
One practical safety concern is handling the hot mug after cooking. Always use oven mitts or a kitchen towel to remove the mug from the microwave, as it can become surprisingly hot. I once grabbed a freshly cooked mug cake with bare hands while distracted, resulting in some minor burns and a valuable lesson in kitchen mindfulness.
Steam buildup can also create safety hazards. The rapid heating creates steam within the cake, which needs somewhere to escape. This is why it’s crucial never to cover the mug completely during cooking. The steam needs ventilation to prevent pressure buildup that could lead to splattering when the covering is removed.
As for nutritional safety, microwave cakes aren’t inherently less healthy than oven-baked versions. The calorie and sugar content depends entirely on the recipe used, not the cooking method. In fact, the shorter cooking time may preserve more nutrients compared to longer baking methods.
Baking a Cake in Your Microwave: The How-To
Creating a delicious cake in your microwave requires a slightly different approach than conventional oven baking. Let me walk you through the fundamental process I’ve refined over countless experimental batches in my Castleton kitchen.
The method begins with choosing the right mug or container. A microwave-safe ceramic mug with straight sides works best. The straight sides allow for even rising, while ceramic provides balanced heat distribution. The mug should be about twice the volume of your batter to prevent overflow, so for most recipes, a 12-16 oz (350-450ml) capacity is ideal.
For mixing, I always start with the dry ingredients directly in the mug, whisking them together with a fork to ensure even distribution of leavening agents. Then I create a small well in the center before adding wet ingredients. This technique prevents flour from sticking to the sides of the mug and helps achieve a smooth batter without overworking it.
When combining wet and dry components, mix just until incorporated, usually about 30-40 fork strokes. Unlike traditional cakes where proper creaming is essential, microwave cakes benefit from minimal mixing. Overmixing develops gluten and can make the final texture rubbery or tough.
The cooking time varies significantly depending on your microwave’s wattage. As a general guideline, a standard chocolate mug cake needs approximately 70-90 seconds in a 1000-watt microwave. Lower wattage machines require longer cooking times, while higher-powered ones need less. I recommend starting with shorter times and adding additional 10-second intervals as needed.
Visual cues are crucial for determining doneness. The cake is ready when it looks set on top but still appears slightly moist in the very center. It will continue cooking from residual heat after removing from the microwave. If the top looks dry and the edges are pulling away from the mug, you’ve likely overcooked it. For tips on keeping cakes moist, refer to the chocolate banana cake recipe.
Unraveling the Magic of Microwave Mug Sponge Cake
The science behind a successful microwave sponge cake fascinates me. Understanding these principles has transformed my mug cakes from disappointing rubbery pucks to delightful treats that rival conventionally baked versions.
Microwave cooking fundamentally differs from oven baking. Conventional ovens heat from the outside in, while microwaves excite water molecules throughout the food simultaneously. This difference explains why microwave cakes cook so quickly but also why they can develop unusual textures if not properly formulated.
The leavening system works differently in microwave cakes. In conventional baking, heat causes gradual expansion of air bubbles and activation of leavening agents, allowing the structure to set slowly. In a microwave, this process happens much faster. I’ve found that baking powder works better than baking soda alone in microwave recipes because it contains both an acid and a base, allowing for quicker reaction times suitable for the rapid cooking environment.
Moisture content plays a crucial role in microwave cake success. The rapid heating can cause moisture to evaporate quickly, potentially leaving dry edges while the center remains undercooked. This is why mug cake recipes typically contain proportionally more liquid than traditional cake batters. Oil often performs better than butter because it distributes more evenly throughout the batter and doesn’t contain water that can evaporate during cooking.
Flour protein content affects the final texture significantly. Lower protein flours (like cake flour) produce tenderer results in the microwave environment because they form less gluten. If using all-purpose flour, minimizing mixing becomes even more important to prevent the development of chewy textures.
The mug itself influences cooking patterns. Ceramic mugs absorb some microwave energy and distribute heat more evenly than glass or plastic containers. The shape matters too, with wider, shallower vessels generally producing more even cooking than tall, narrow ones.
Residual cooking continues significantly after the microwave stops. This carryover cooking can easily push a perfectly cooked cake into overcooked territory. I’ve learned to remove the cake when the center still looks slightly underdone, knowing it will reach perfect doneness during the standing time.
Understanding these principles has helped me develop a reliable approach to microwave baking. Rather than seeing the microwave as a compromise cooking method, I’ve come to appreciate it as a unique tool with its own advantages and techniques. When properly harnessed, this understanding transforms a simple mug cake from a desperate sugar fix into a legitimately delicious dessert.
Conclusion
My journey to perfect the microwave mug cake began with late-night chocolate cravings and a daughter with an allergy, pushing me to explore alternatives that didn’t require firing up the oven. What started as a convenience has become something of an art form in our Castleton kitchen, with Molly often requesting her favorite variations for after-school treats.
The beauty of mastering microwave cake techniques lies in the freedom it provides. Once you understand the principles behind successful microwave baking, you’ll find yourself experimenting with flavors and ingredients, creating personalized desserts that suit your exact preferences. The microwave is no longer just a reheating tool but a legitimate baking method with its own unique advantages.
I’ve found particular joy in sharing this skill with Molly’s friends during sleepovers. Watching their faces light up as they create their own desserts gives me the same satisfaction as more elaborate baking projects, but with significantly less cleanup. There’s something magical about transforming simple pantry ingredients into a warm, comforting treat in less time than it takes to preheat a conventional oven.
Remember that perfection comes with practice, and even mistakes are rarely inedible. Each microwave has its own personality, and part of the process is learning your equipment’s quirks. Trust your instincts, adjust as needed, and soon you’ll develop an intuitive sense for when your mug cake has reached that perfect state of doneness. If you’re looking for more delicious ideas, explore our blueberry crumb bars recipe.
Love this recipe? Follow us on Facebook and Pinterest and explore more creative ideas on our food blog!
Frequently Asked Questions
How to make a mug cake in the microwave perfectly?
For a perfect microwave mug cake, start with a microwave-safe ceramic mug that’s twice the size of your batter. Combine dry ingredients first, create a well for wet ingredients, and mix just until combined (about 30 strokes). Cook at 70-80% power rather than full power, starting with 70-90 seconds for a 1000W microwave. Stop when the top looks set but the center appears slightly moist, then let it rest for 2 minutes before eating. This rest period is crucial for the final texture.
Is it generally safe to cook food, specifically cakes, in the microwave?
Yes, it’s completely safe to cook cakes in the microwave when done properly. Microwaves use non-ionizing radiation that heats food by exciting water molecules but doesn’t make food radioactive or harmful. The key safety considerations are using microwave-safe containers without metallic decorations, ensuring ingredients reach safe temperatures (which happens easily with the high heat generated), and being careful when handling the hot mug after cooking.
Can you achieve a traditionally baked cake texture using only a microwave?
While microwave cakes have a slightly different texture than oven-baked ones, you can achieve remarkably good results with the right techniques. The secret is using slightly more moisture in your recipe, cooking at reduced power (70-80% instead of full power), stopping cooking when the cake still looks slightly moist in the center, and allowing a 1-2 minute rest period after cooking. Oil often works better than butter for moisture retention in microwave cakes.
What are the key steps to making a fluffy sponge mug cake in the microwave?
For a fluffy sponge texture in a microwave mug cake, ensure your baking powder is fresh and well-distributed throughout your dry ingredients. Don’t overmix the batter (30-40 strokes maximum) to avoid developing gluten. Use room temperature ingredients for better incorporation, and cook at 70-80% power rather than full power for more even heating. Most importantly, remove the cake when the center still looks slightly underdone, as it will continue cooking during the critical 2-minute rest period.
Are there specific techniques to ensure your microwave mug cake doesn’t overflow?
To prevent overflow disasters, never fill your mug more than halfway with batter, as the cake will rise significantly during cooking. Choose a mug with straight rather than sloped sides to direct the rise upward instead of outward. If your recipe seems too large for your container, divide it between two mugs. For extra insurance against overflow, place your mug on a microwave-safe plate to catch any potential spills.
How do different ingredients impact the final texture of a microwave mug cake?
In microwave mug cakes, oil produces moister results than butter because it distributes more evenly and doesn’t contain water that evaporates during cooking. Lower-protein flours like cake flour create tenderer textures than all-purpose flour. Brown sugar adds moisture compared to white sugar, while adding a tablespoon of yogurt, sour cream, or applesauce creates insurance against dryness. Leavening is crucial, with baking powder typically performing better than baking soda alone due to its dual-action properties in the rapid microwave environment.
Can healthier substitutions be made without compromising taste in a mug cake?
Yes, several healthier substitutions work surprisingly well in microwave mug cakes. Applesauce or mashed banana can replace half or all of the oil, though this creates a slightly denser texture. Whole wheat pastry flour can substitute for all-purpose flour with minimal texture change. Greek yogurt adds protein and moisture while reducing fat. For sweeteners, reducing sugar by 25% rarely affects texture, while maple syrup or honey can replace sugar (reduce other liquids slightly to compensate). Almond or oat milk works perfectly in place of dairy milk.